Campaigns: Campaign Triggers
Campaign triggers are simple but effective ways to customise your workflow inside Outbound, allowing you to automatically process leads, stay on top of customer interactions, send data to your CRM, and much more.
What can I do with campaign triggers?
👉 Clone the lead to another campaign
👉 Send an email or SMS
👉 Make a HTTP request, and send data to your CRM or other external system
👉 Modify the lead, changing the status, data fields, owner, or scheduling a redial.
How are triggers built?
Campaign triggers comprises of two pages to help you manage all your triggers: the first is Campaign Triggers, and the second is Trigger Actions.
Think of triggers in two parts, as the trigger itself, and an action.
What is a Campaign Trigger?
A campaign trigger looks at a certain set of conditions you have configured, based on an interaction with a lead, and the outcome.
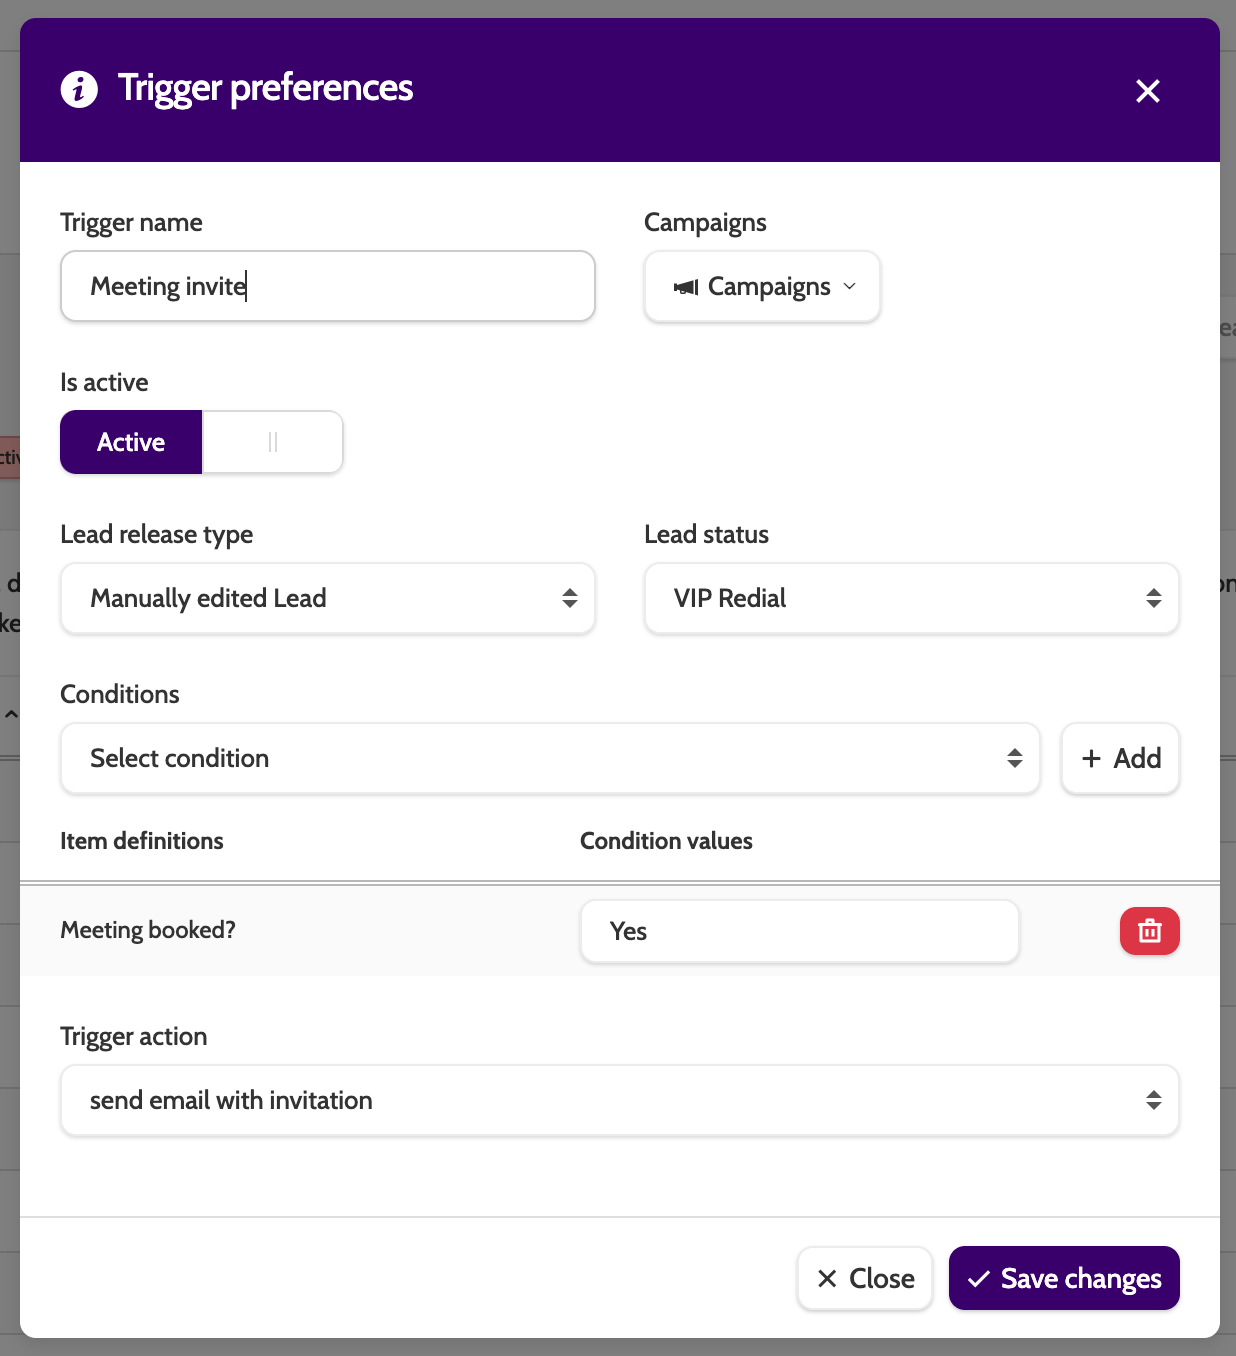
In the image below, the trigger will only be activated when the following conditions are met:
- The lead is manually edited by an agent
- The agent sets the lead as a VIP redial
- In the campaign template, the field called Meeting booked? has the value Yes filled in.
What is a Trigger Action?
A trigger action is simply an action that is performed when a lead meets the conditions configured in Trigger preferences.
Trigger actions can be linked to multiple triggers and campaigns, decreasing the need for repetitive administrative tasks.
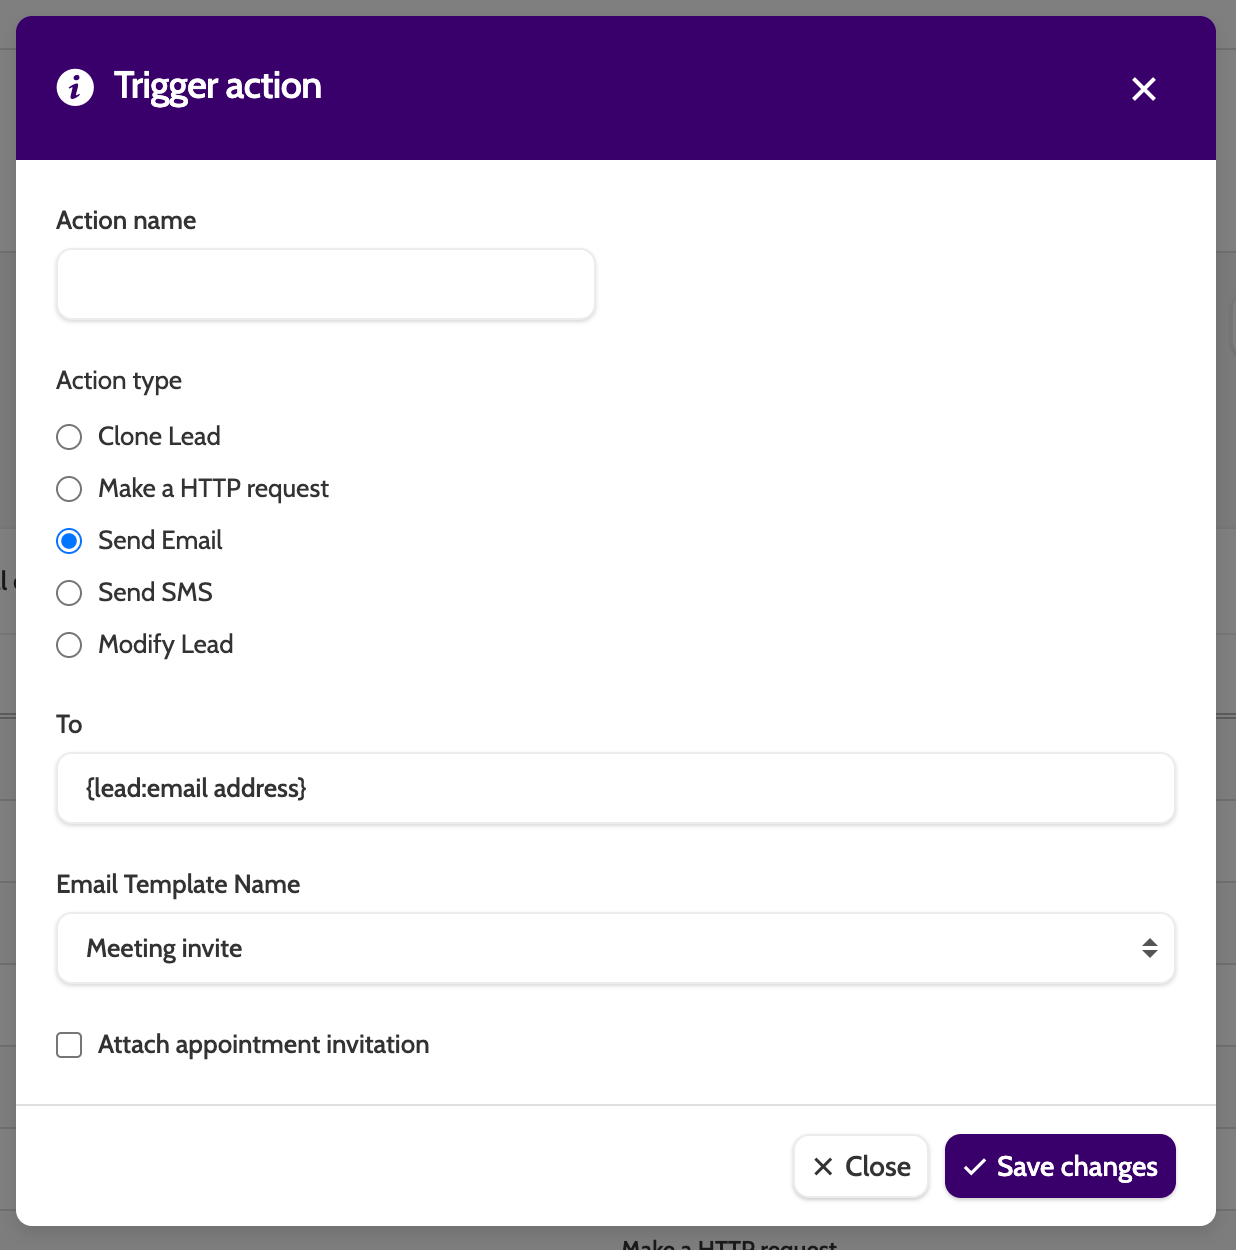
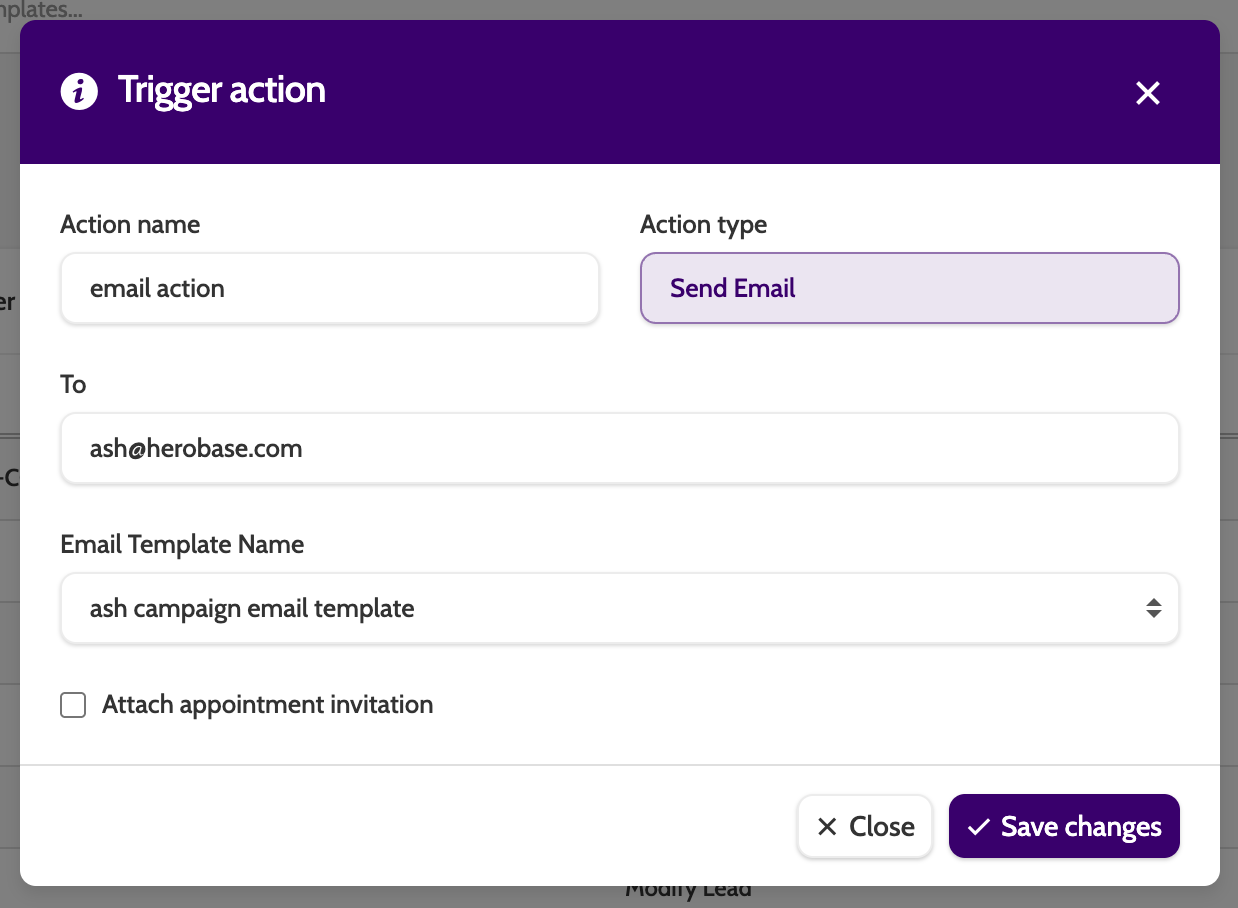
In the image below, the trigger action will:
- Send an email
- To the lead's email address
- Send the email template called 'Meeting invite'.
Tip: Insert a merge field that will take the email address of the lead and use it as the recipient address.
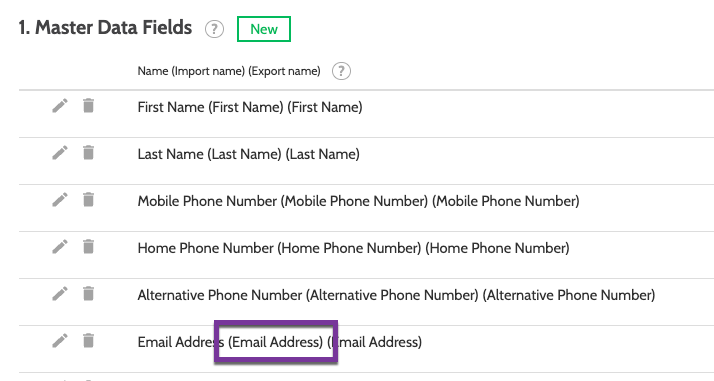
In the images below, I have taken the Import Name of the Master Data Field, and placed it in the merge field: {lead:email address}.
Triggers Overview
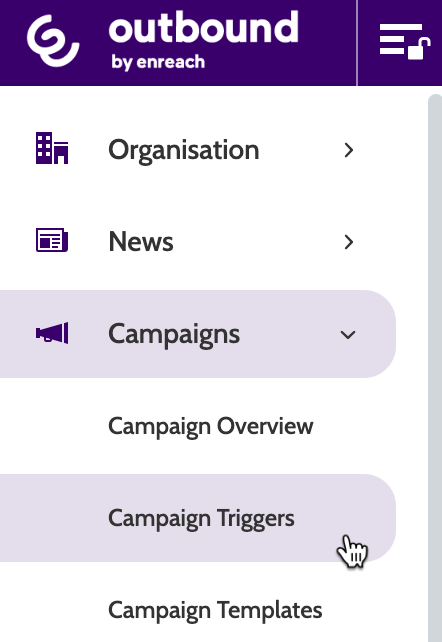
You'll find Campaign Triggers under the Campaigns menu.
Note - it is still possible to create and edit triggers in Campaign settings, but it's only in Campaign Triggers that you'll be able to get a total overview of all your triggers across campaigns, and create, manage, and edit them from one single page.
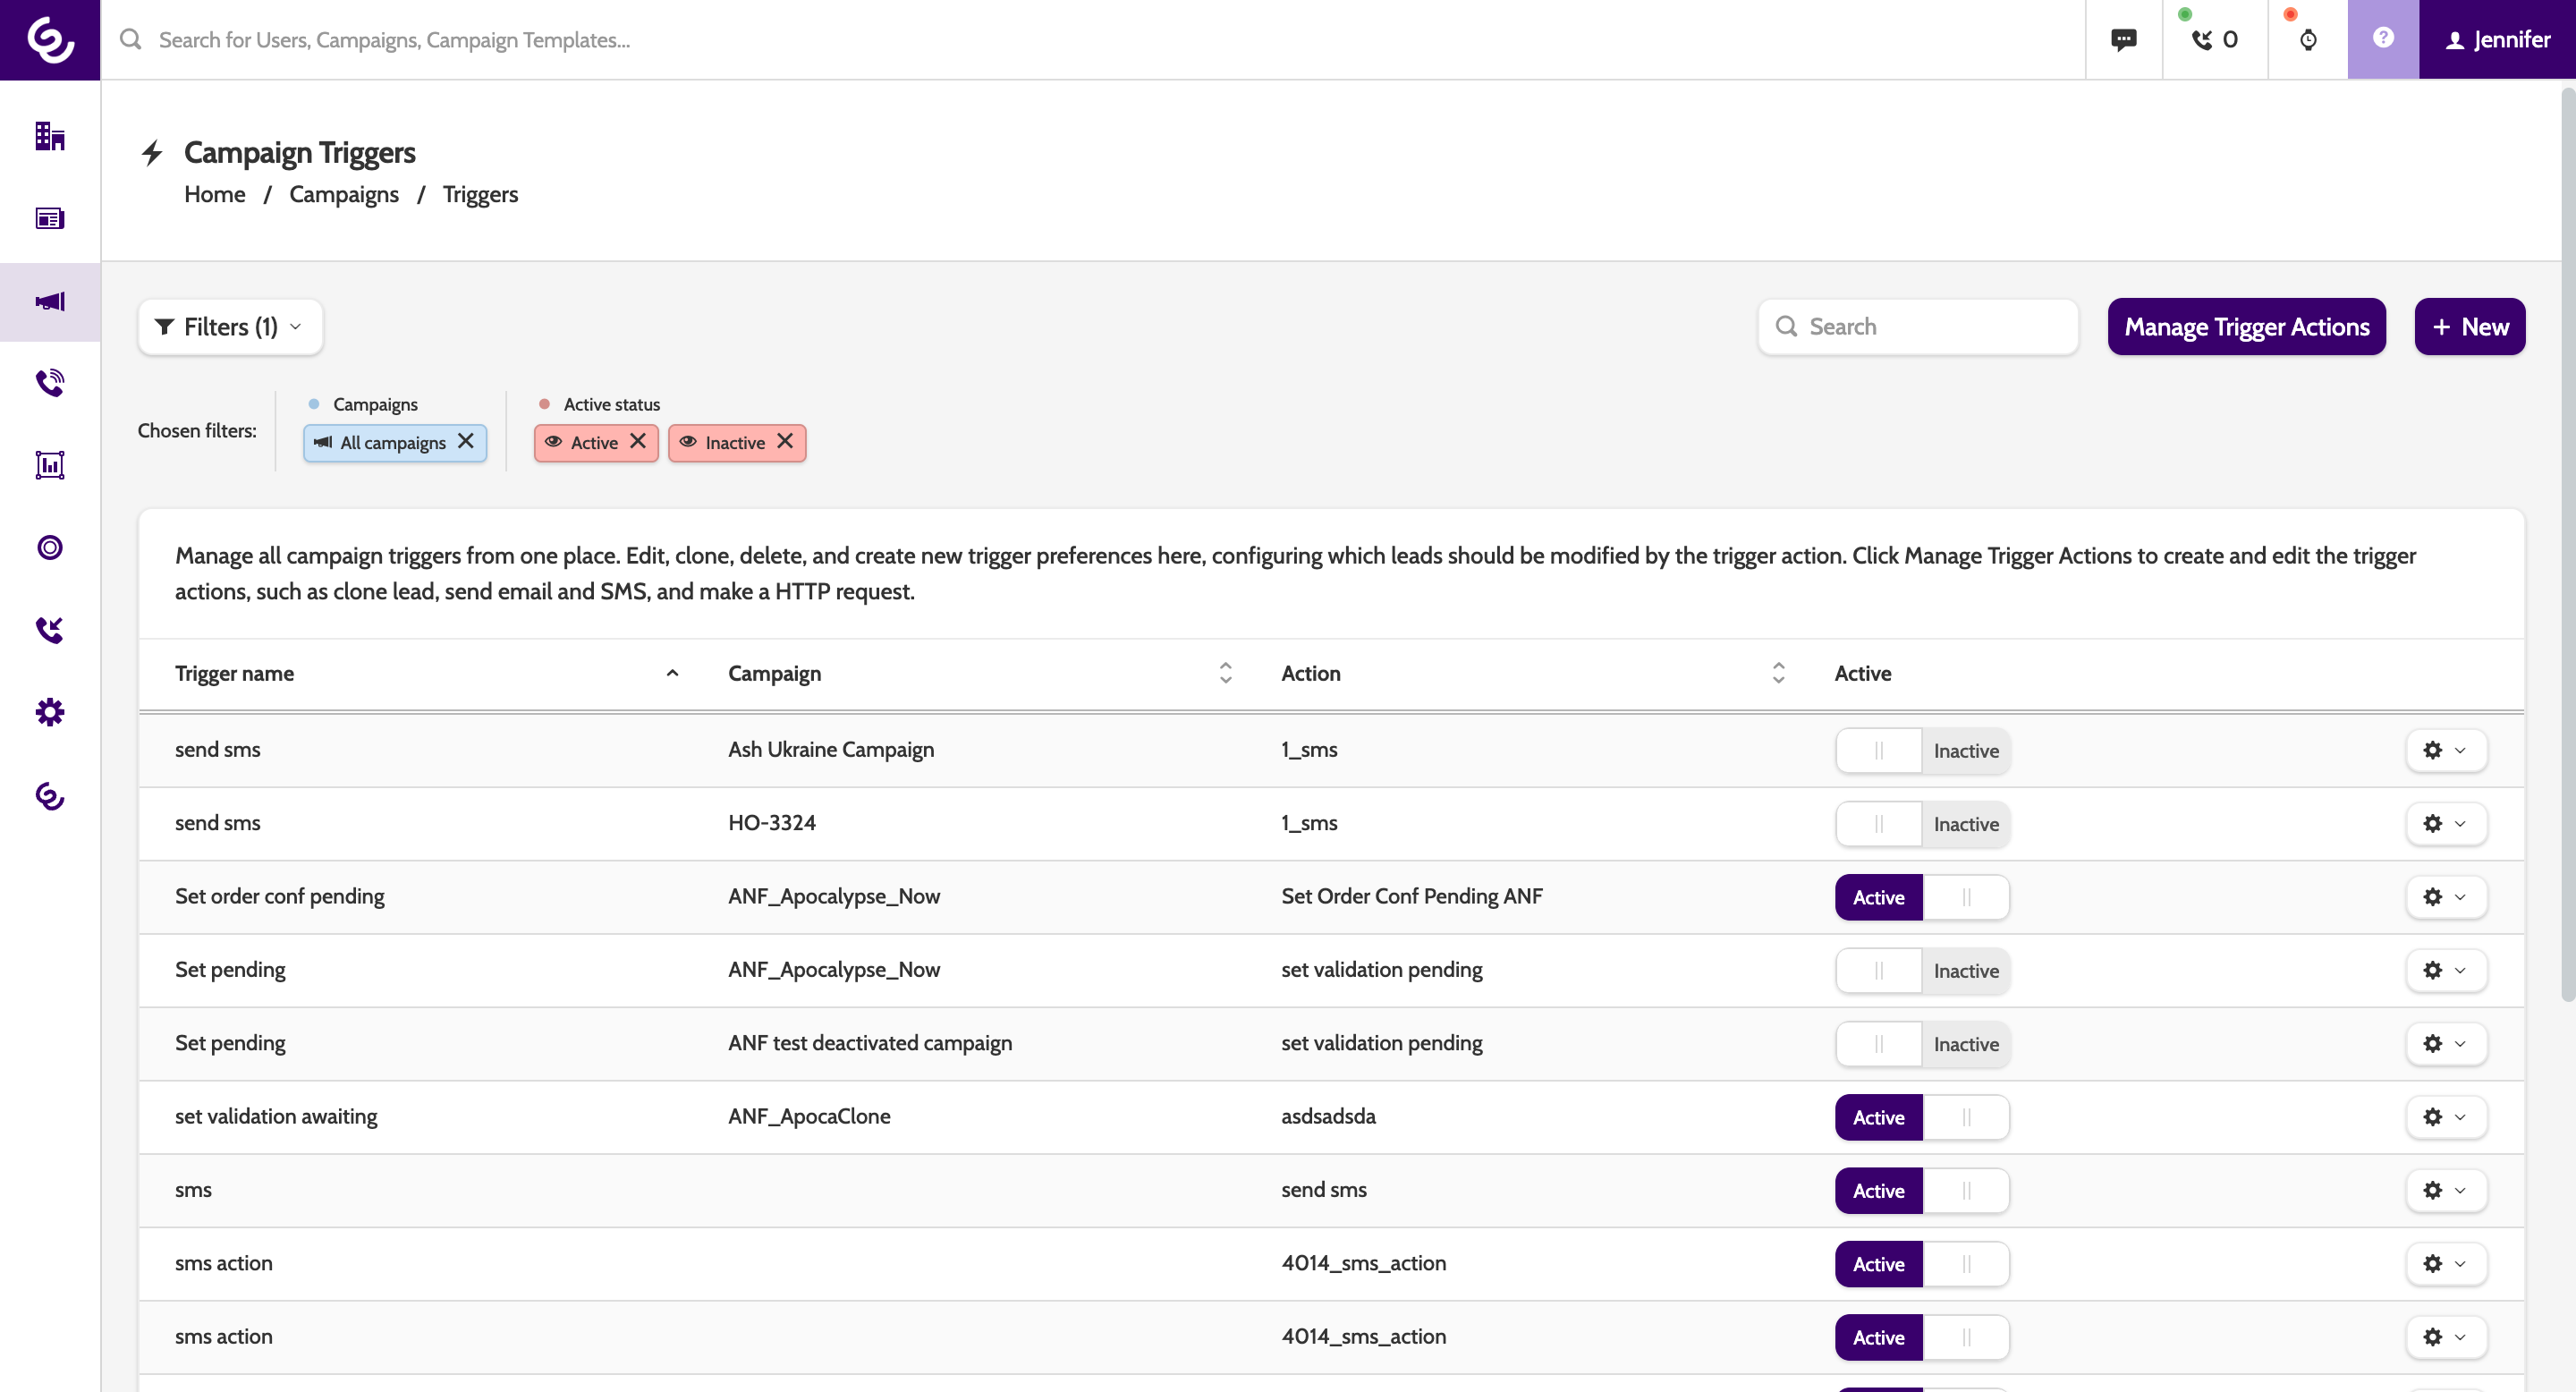
Overview
The overview page will display all of your campaign triggers, including the trigger name, which campaign it belongs to, the action it performs, and it's active status.
Create a new Trigger
Before you create a trigger you must have already created the Trigger Action! Jump to Trigger Actions to find out how.
Start by clicking New to create a trigger.
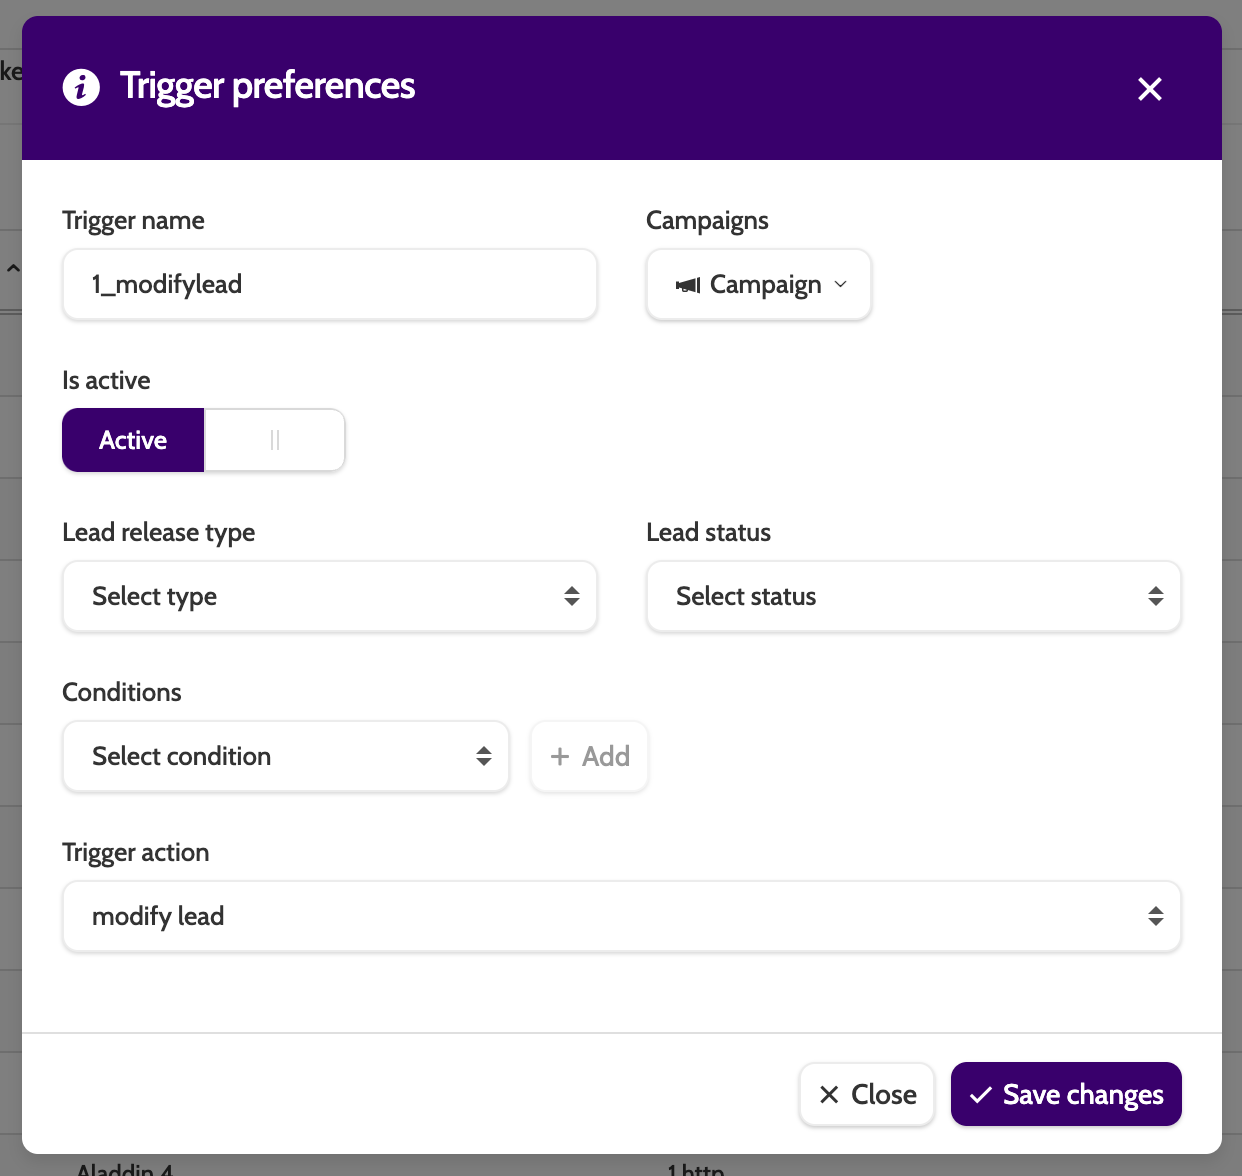
In the pop-up, start entering your trigger preferences:
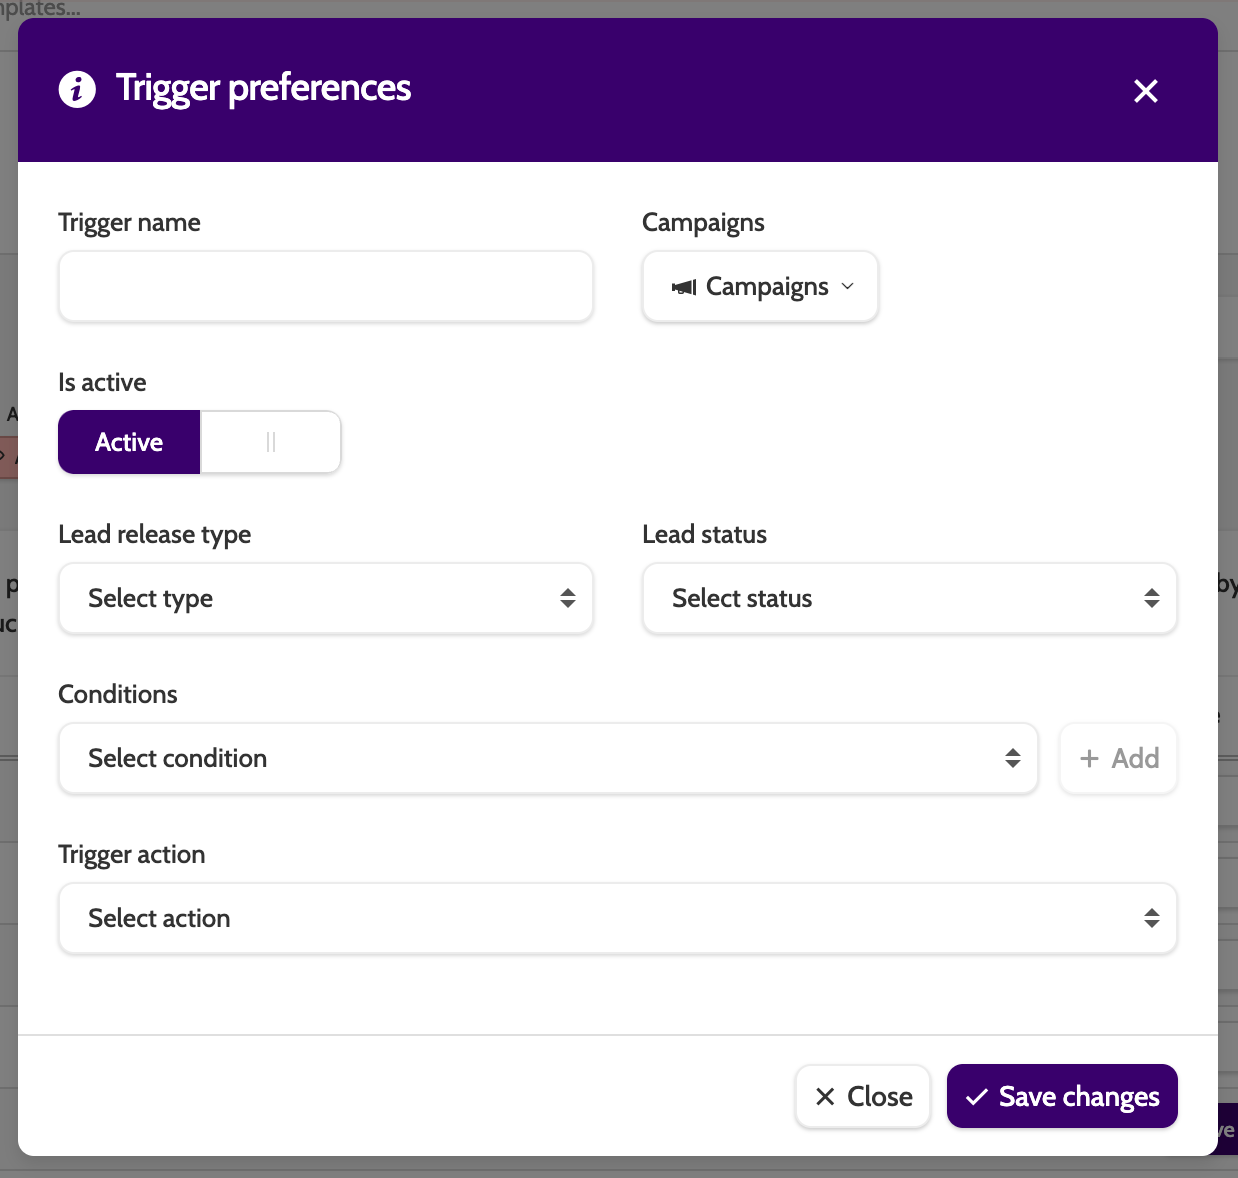
- Trigger name: enter a descriptive name for your trigger. This will make it easier to identify if you have many
- Campaigns: select the campaign or campaigns you want this trigger to run on
- Is active: keep the toggle to active if you want the trigger to start working
- Lead release type: select the type of lead this trigger will work on. For example, if you want to automatically send an SMS to a lead that hasn't answered their phone after 3 attempts (if 3 is the maximum set in the Campaign Settings), then you would choose 'Closed Lead after Max. Call Attempts', and the trigger action would be to send an SMS
- Lead status: select from 16 lead statuses this trigger will apply to
- Conditions: conditions allows you to target leads with specific data that you specify. Expand the Conditions drop down to select a campaign template field. In the Condition Values text field, enter what should be in that lead field. For example, if the condition is City and the the value is Copenhagen, then the trigger will only target leads from Copenhagen
- Trigger action: link an action to the trigger to complete the setup.
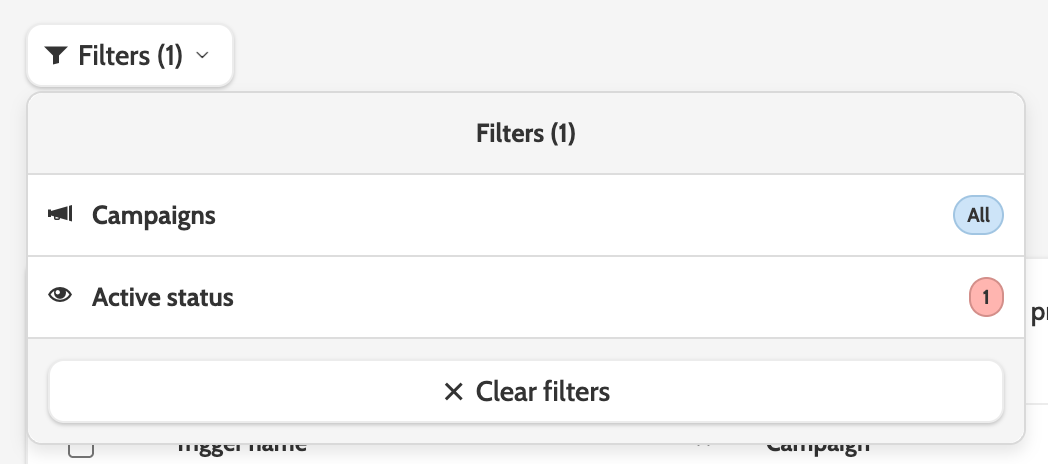
Filters
Use the filters to display triggers based on which campaigns they belong to, and if they are active or not.
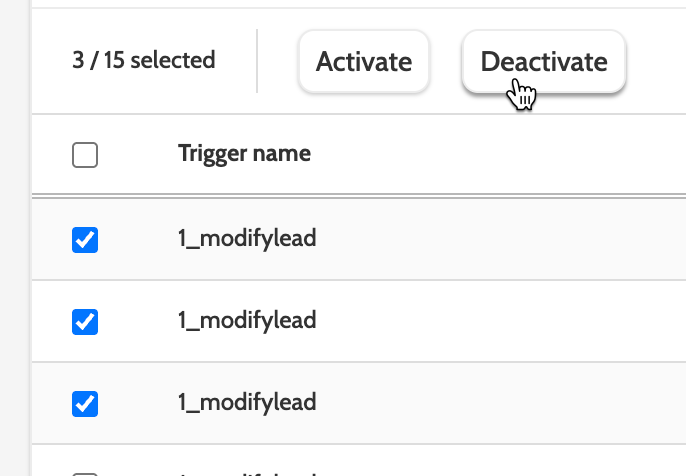
Edit
Click the checkbox to activate or deactivate multiple triggers.
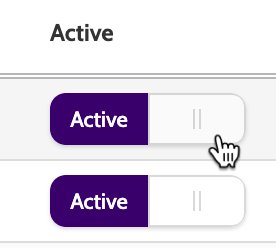
You can also edit a single one by toggling the Active toggle.
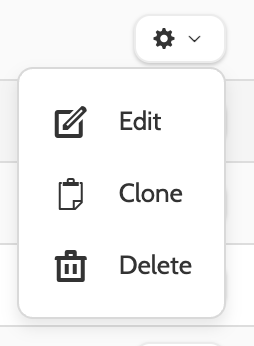
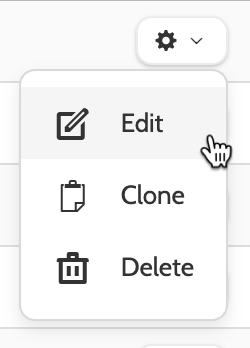
Edit, Clone, Delete
There are three options when working with an existing trigger.
Click the cog icon to select one.
Edit
Click Edit to open the Trigger preferences modal.
Here you can change which campaigns it belong to, which leads it should work with, and which trigger action it is linked to.
Clone will open the same modal and allow you to select a different campaign to attach it to.
It's also possible to modify the other options when cloning a trigger.
If you choose to delete, you will need to confirm.
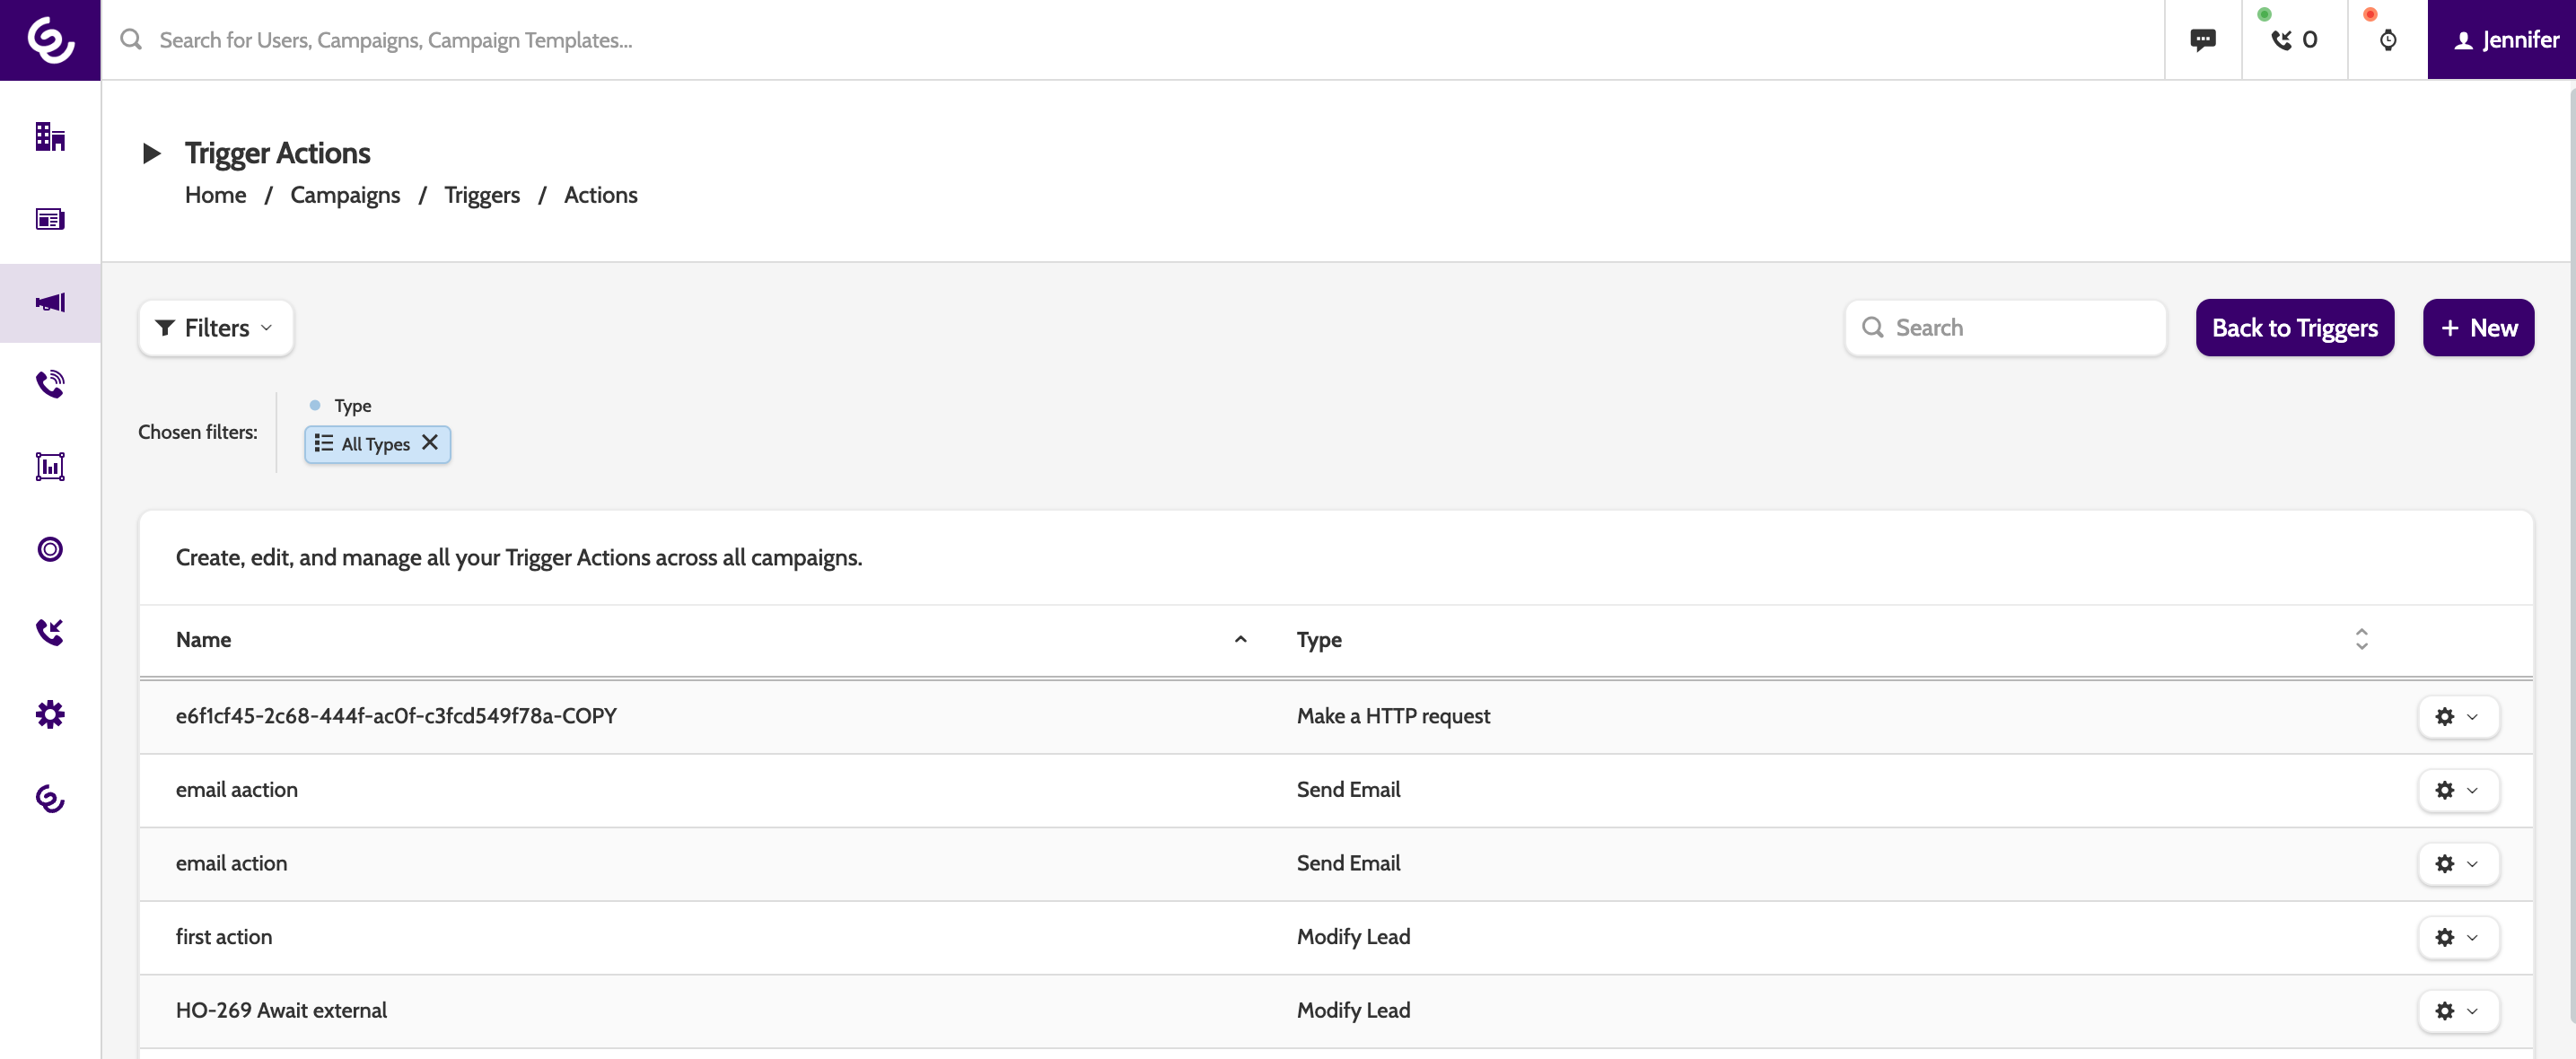
Trigger Actions Overview
Trigger actions is where you can create, edit, and manage all your actions, such as modify lead, or make a HTTP request.
Click Manage Trigger Actions to navigate there:
In the overview you can see all existing trigger actions, the name, and the type.
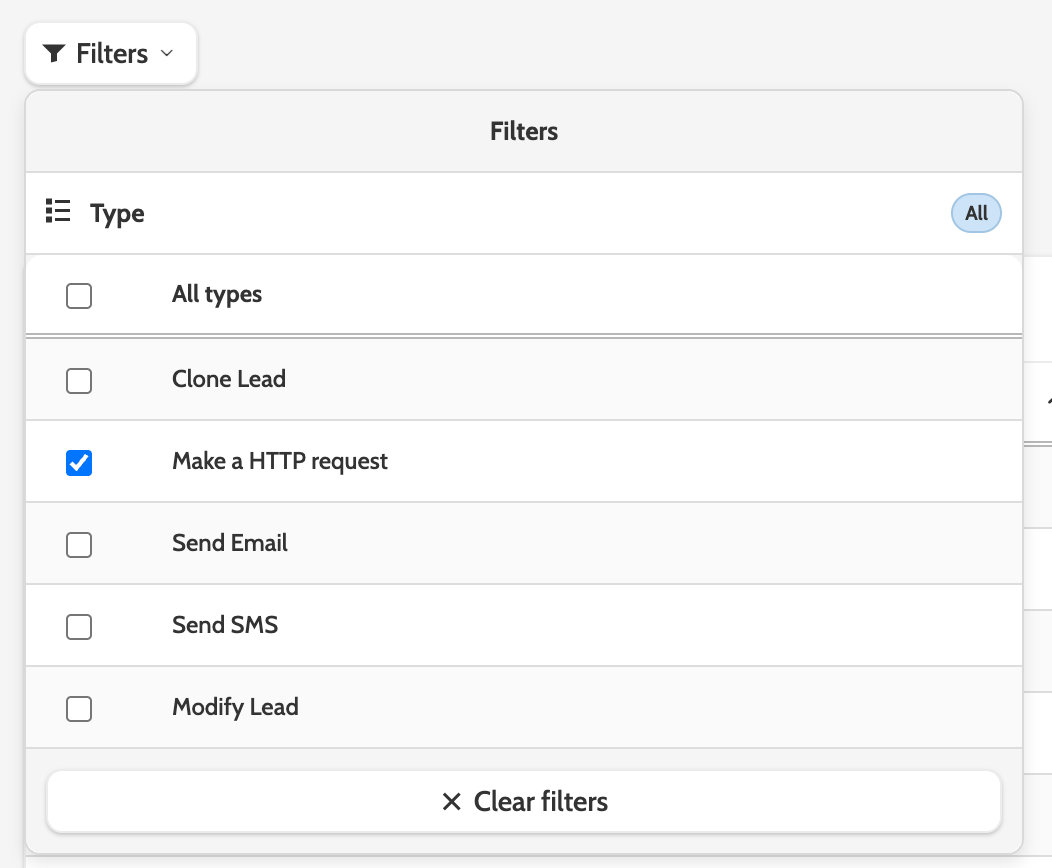
Filters
Filter the overview by selecting which actions to display.
Edit, Clone, Delete
There are three options when working with trigger actions.
Click Edit to make adjustments to the action.
Click Clone to make a copy of the action, and click Save Changes.
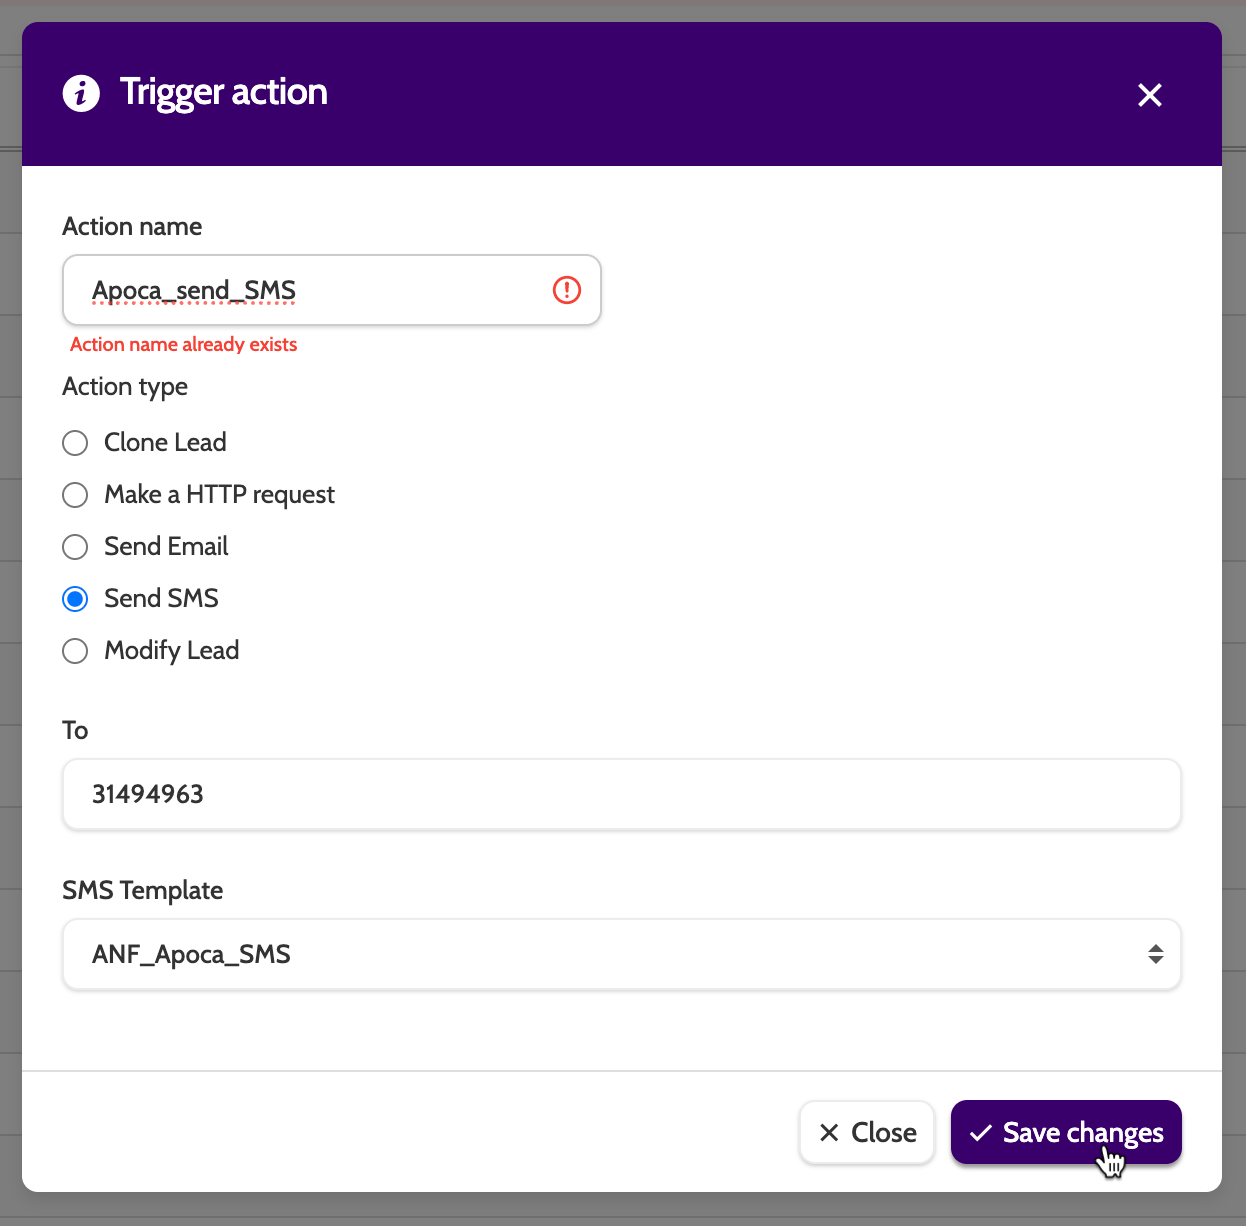
You must save the action with a new name before saving:
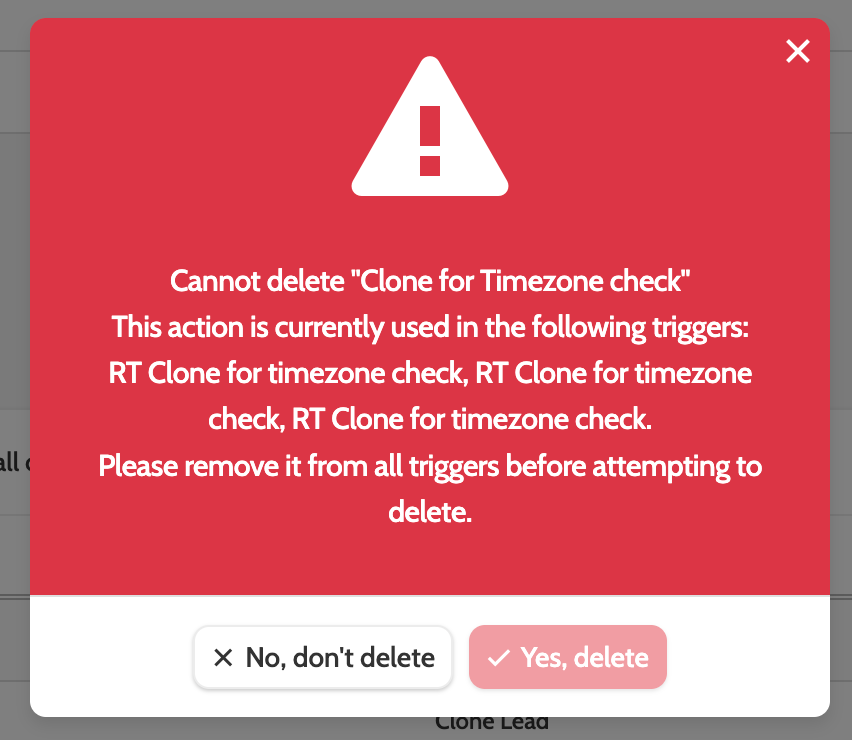
When deleting an action you will either be asked to confirm, or be informed that it can't yet be deleted, as it's currently be used by other triggers.
Create a new action
Click New to create a new trigger action.
There are five action options to choose from. Let's start from the top:

Clone Lead
Clone lead will clone an existing lead to another campaign, with options to change the owner, and automatically set a redial.
What can I use this for?
You've successfully sold to your customer and closed the lead as a success. However, you want to call again in three months and see how they are getting on.
The Clone Lead trigger action can clone that lead to a special 'check-up' campaign, ensuring that in three months time, the agent that closed the sale will be able to call the customer and get their feedback.
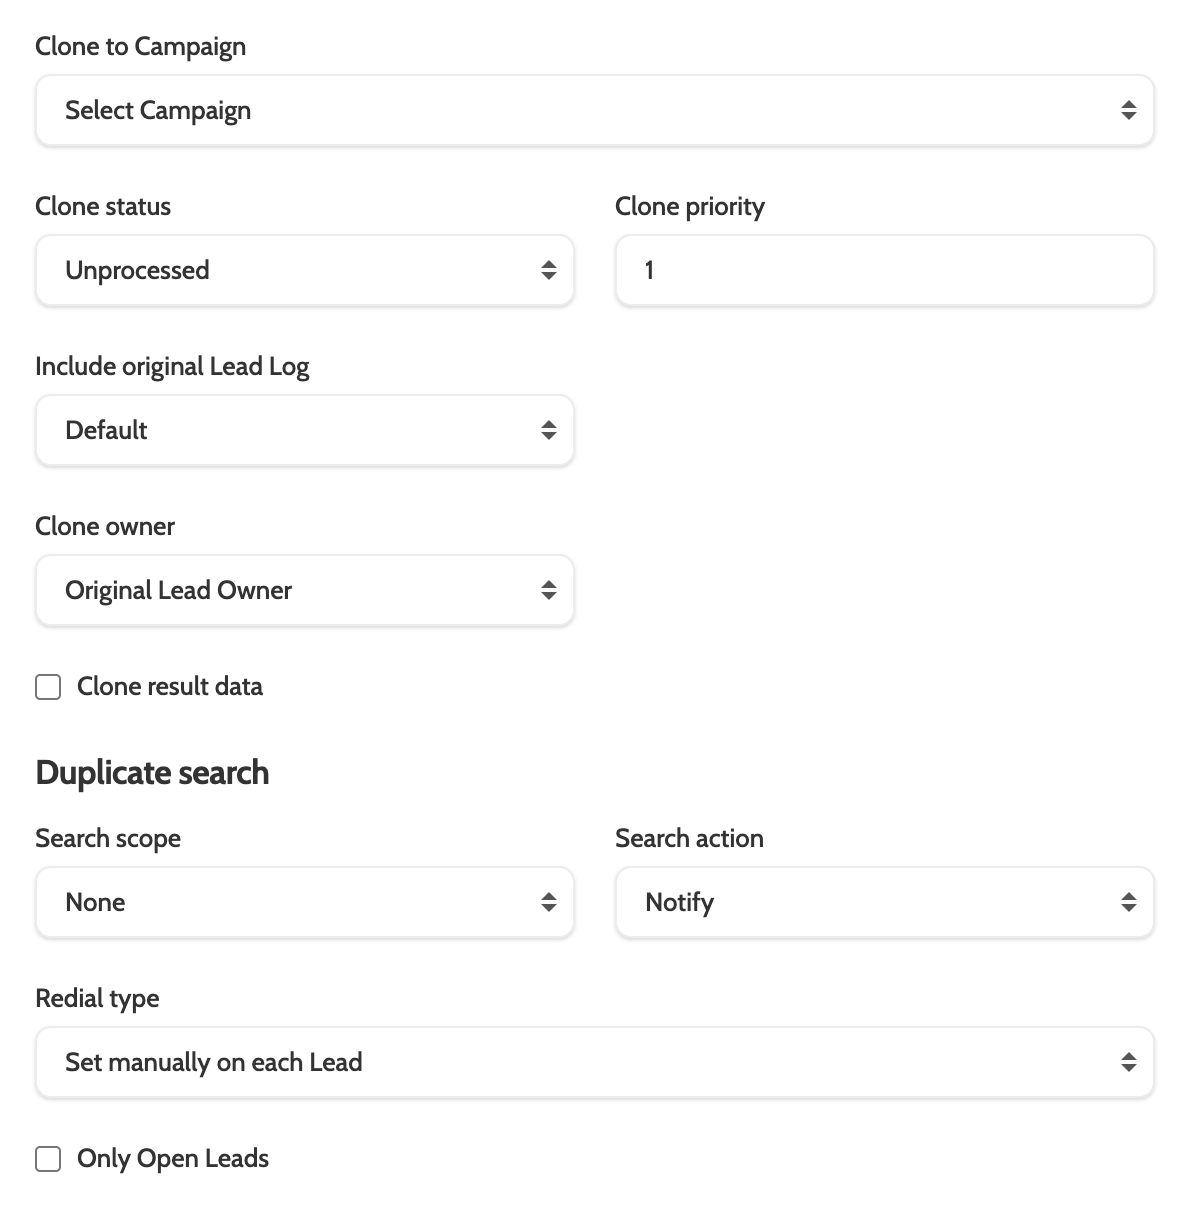
- Clone to Campaign: select the campaign the lead will be cloned to
- Clone status: select which status the cloned lead will be given
- Clone priority: if you're working with lead priority, set the value here (more on lead priority below)
- Include original lead log: choose whether to include the original lead log in the cloned lead
- Clone owner: decide who should own the cloned lead
- Clone result data: tick to include the original result data
- Duplicate search - Search scope: it can be useful to check if the lead already exists in the destination campaign or project. Select an option to perform a duplicate search
- Search action: if a duplicate lead is found, select how you would like to handle it
- Redial type: choose to automatically set a redial for the cloned lead, or select 'set manually on each lead' to let the agent determine if and when the lead should be called again
- Only open leads: check this box to apply redial settings only to open leads.
What is lead priority?
Lead priority is a system used to differentiate and manage the importance of leads within the same status. By assigning a priority, you can determine which calls should take precedence, ensuring that the most critical leads are addressed first. Lead priority can be adjusted either by uploading a CSV file with specified priorities, manually changing them through lead administration, or assigning a priority to a trigger-cloned lead.
Key Points on Lead Priority:
- Priority Levels: It is recommended to use priority levels ranging from 1 to 10, with 1 being the highest priority and 10 the lowest
- Impact on Call Order: While lead priority influences the order of calls, it does not override the status-based order. For example, a private redial will always take precedence over a common redial, regardless of priority
- Role Assignment: Assigning a lead priority role to a user ensures they connect only with leads within their designated priority span. This is done in Manage Organisation > Edit User
- Optimising Assignments: Leads with higher conversion potential can be assigned to more experienced agents, optimising resource allocation and improving outcomes.
This system helps in efficiently managing leads and aligning them with the most suitable agents to enhance conversion rates.
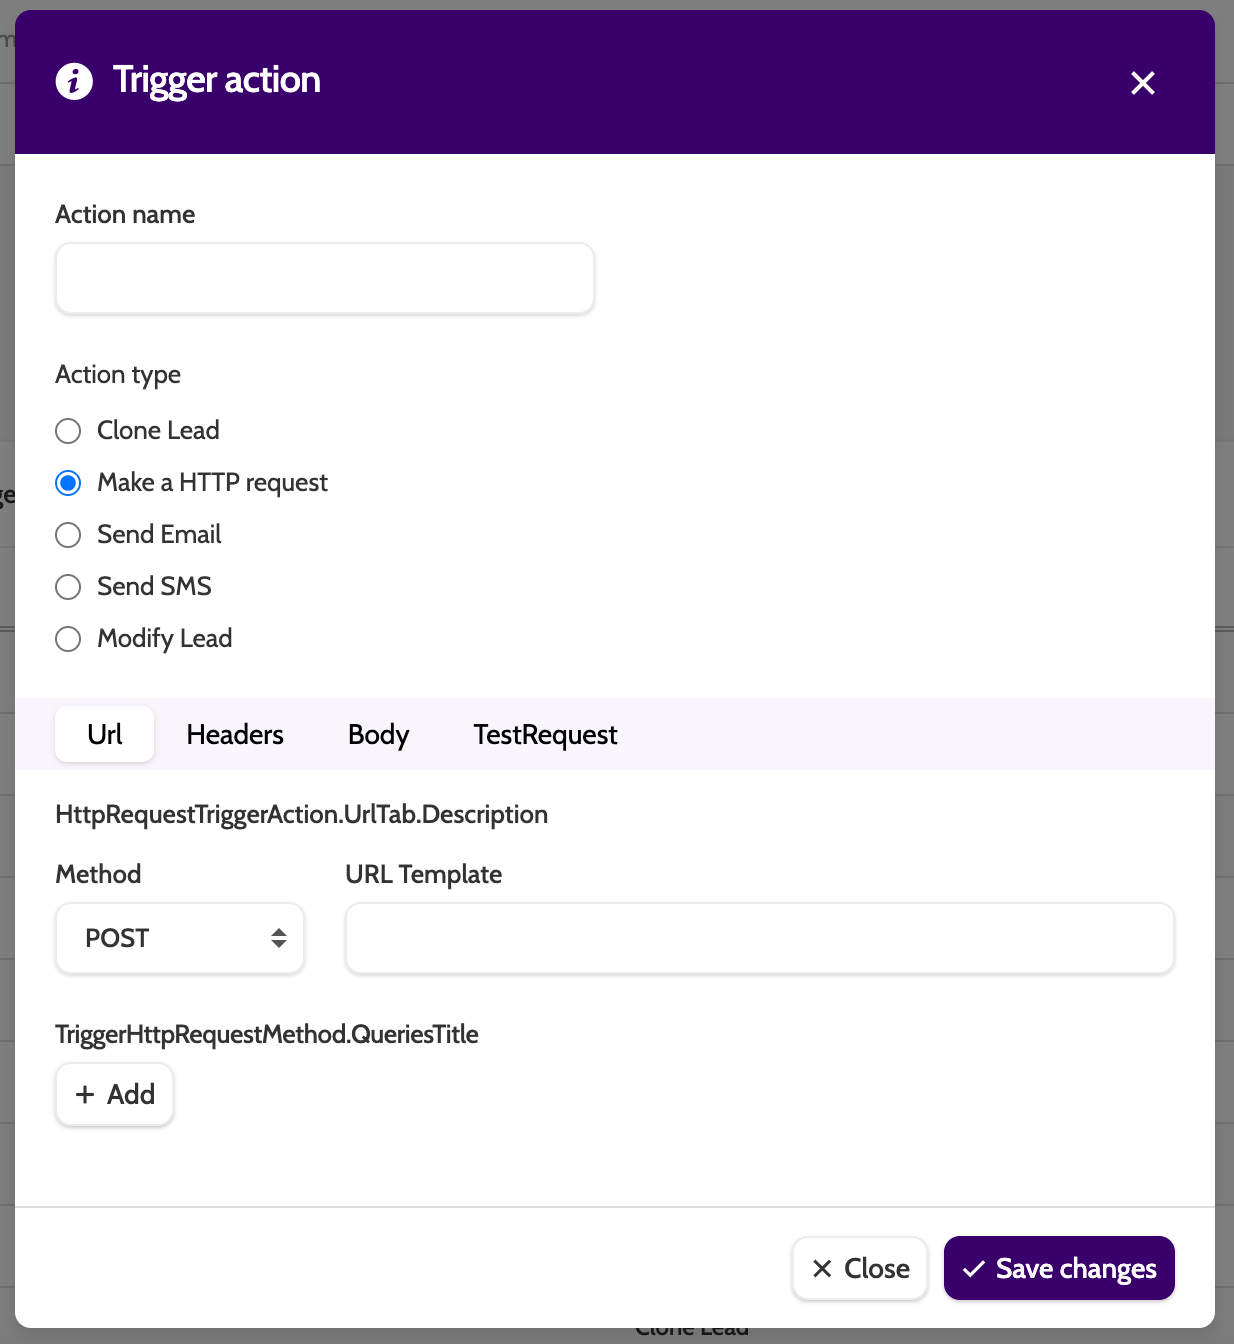
Make HTTP Request
Create a HTTP request and test it from scratch. To learn how to do that, head to this guide.
Send Email
Send Email allows you to automate the sending of emails once specific lead conditions are fulfilled. This minimises manual work and lowers the chance of errors.
What can I use this for?
Automate welcome emails for new customers, send geographically-specific offers for leads based in different regions, or call or meeting reminders.
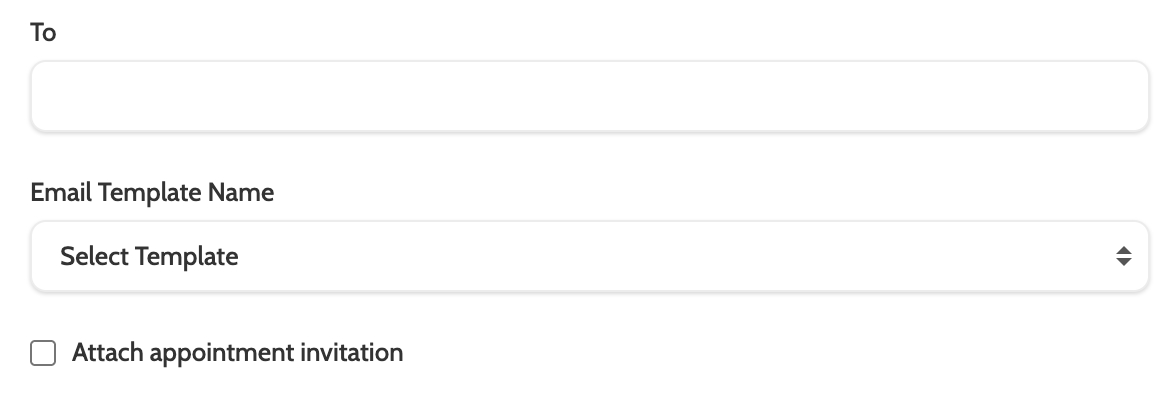
- To: enter the recipients email address. To create a generic send to all qualifying leads, insert a merge field, as described below
- Email template name: select the email template from the list. Email templates are created in Campaigns > Email Templates
- Attach appointment invitation: if an appointment has been scheduled on the contact page, then check the box to include the ics. invite in the email.
Tip: Insert a merge field that will take the email address of the lead and use it as the recipient address.
In the images below, I have taken the Import Name of the Master Data Field, and placed it in the merge field: {lead:email address}.
Send SMS
Like with send email, Send SMS allows you to automatically send SMS once lead conditions have been met.
What can I use this for?
Send promotional messages to customers, links to NPs surveys, or other CTAs.
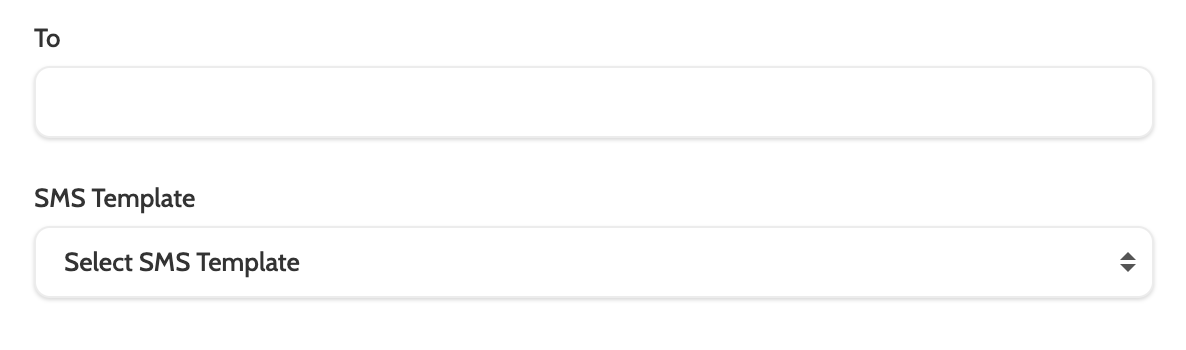
- To: enter the recipient phone number. To create a generic send to all qualifying leads, insert a merge field that includes the name of the mobile phone data field - for example {lead:mobile.phone.number}
- SMS Template: select the SMS template from the list. SMS templates are created in Campaigns > SMS Templates.
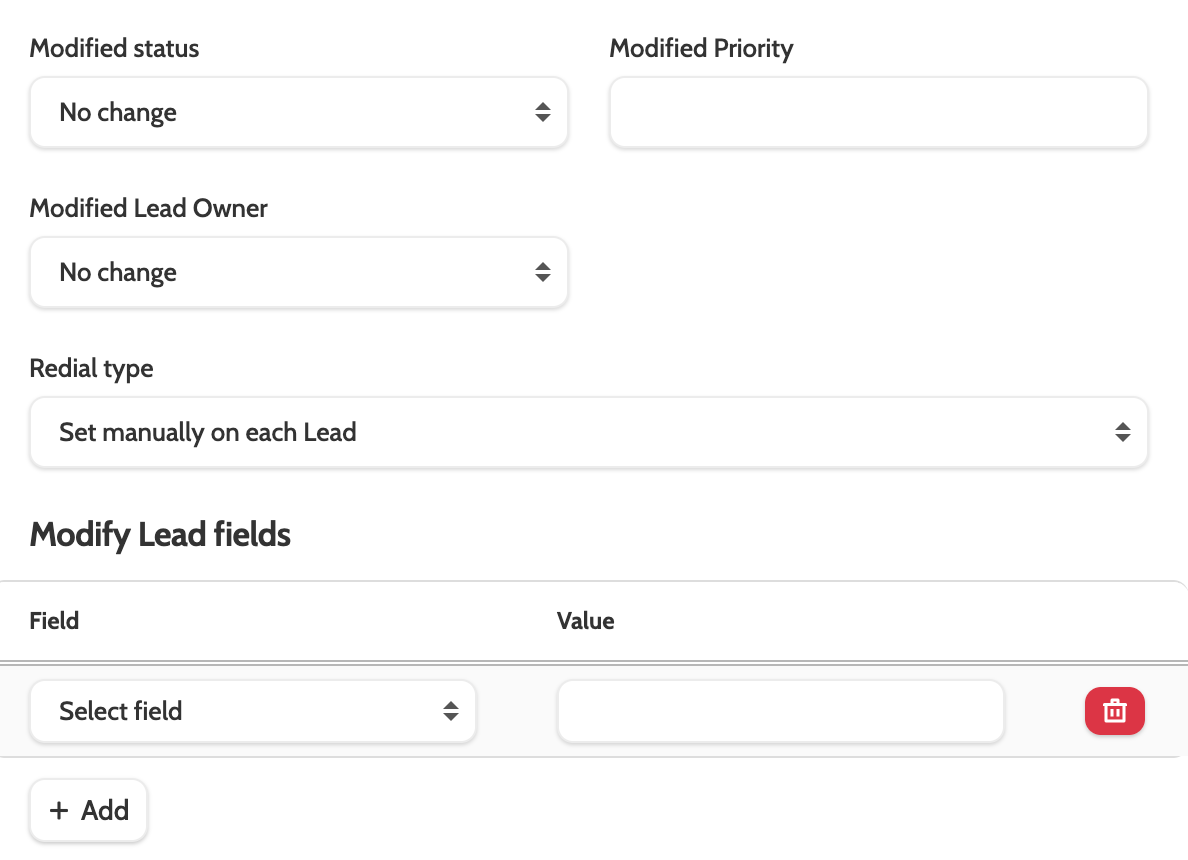
Modify Lead
Modify lead will allow you to change the status of the lead, as well as modify the owner, schedule a redial, and make changes to lead and result data.
What can I use this for?
Automate lead life cycle flows by moving leads between different statuses, such as Order Confirmation Ready For to Order Confirmation Pending. Change ownership of certain leads to a different team or user, ensuring they receive specialised care, or automatically update the notes field in the lead data to contain standardised information about where they are in your business flow.
- Modified status: select a new status for the lead. Optional
- Modified priority: to grant a lead priority, enter the number here. Read more about lead priority above, by clicking Clone Lead in the menu
- Modified lead owner: select a specific user or team that will own the lead once it's been modified
- Redial type: choose to automatically set a redial for the cloned lead, or select 'set manually on each lead' to let the agent determine if and when the lead should be called again
- Modify lead fields: to change the data in the lead's field, click Add, select a campaign template field, and enter the new value in the text box.
When you're finished, remember to click Save changes!