
Quickstart: Understanding your organisation, creating teams & users
Manage teams, users, permissions, and lead data access to keep your operations running smoothly.
Click any image to enlarge!
Before you start
- You must be an admin or part of the top-level team to create teams and users.
- Have the following ready when creating a new user:
- Name
- Email address (for login)
- Calling country
Step-by-step
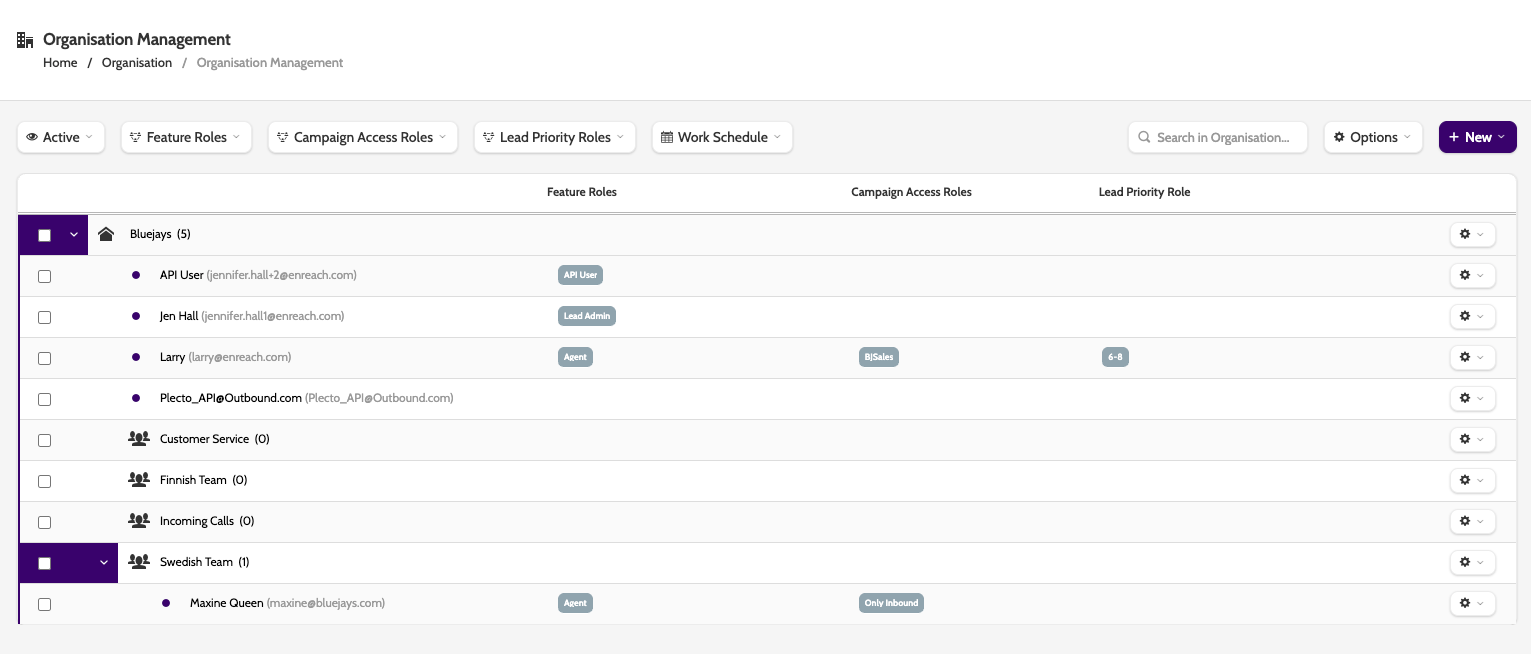
1. Create a Team or User
- Go to Organisation > Manage Organisation.
- Click New → New Team or New → New User.
- For a new user, enter the name, email address, and calling country. These are the mandatory fields,

All other settings can be configured later!
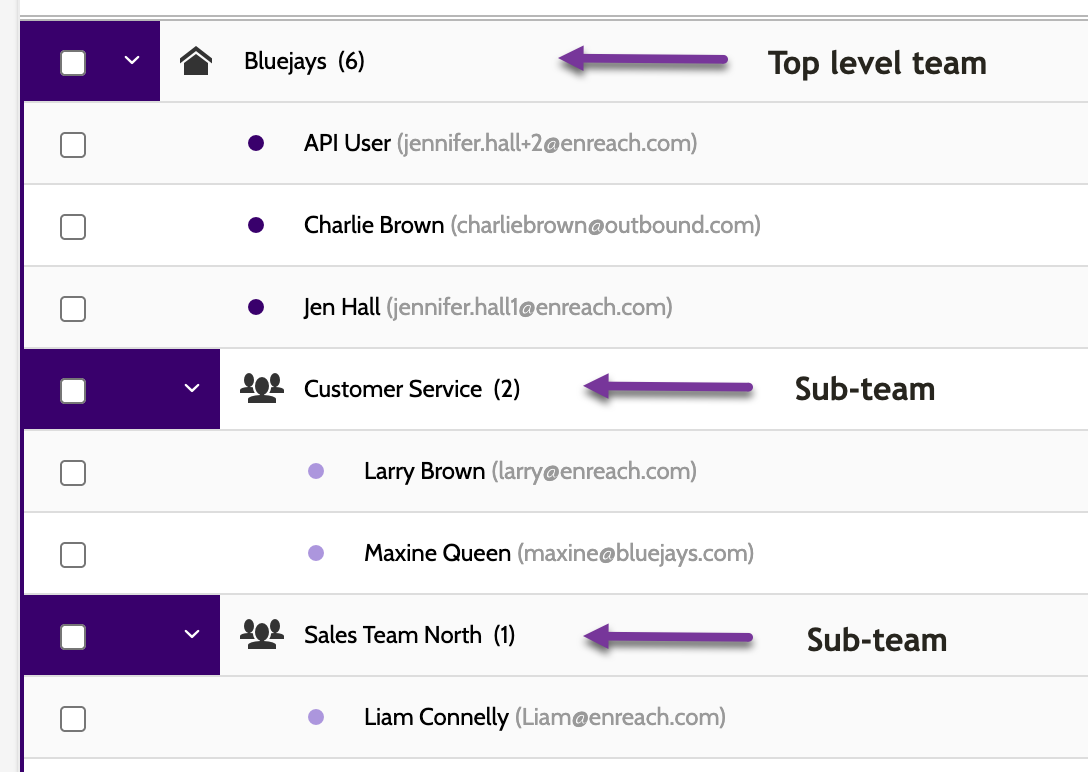
2. Understand the Organisation Hierarchy
Your organisation uses a parent–child hierarchy:
- The top-level team usually contains admins and has access to everything.
- Sub-teams sit beneath it.
- A user can call/work leads if:
- They own the lead, or
- The lead belongs to their team, or
- The lead belongs to the team directly above theirs.
For example:
- Charlie can only call leads belonging to him or the Bluejays team
- Larry can call leads that belong him, to The Bluejays and the Customer Service team, but not Sales Team North
- Liam can call leads that belong to him and to all teams.
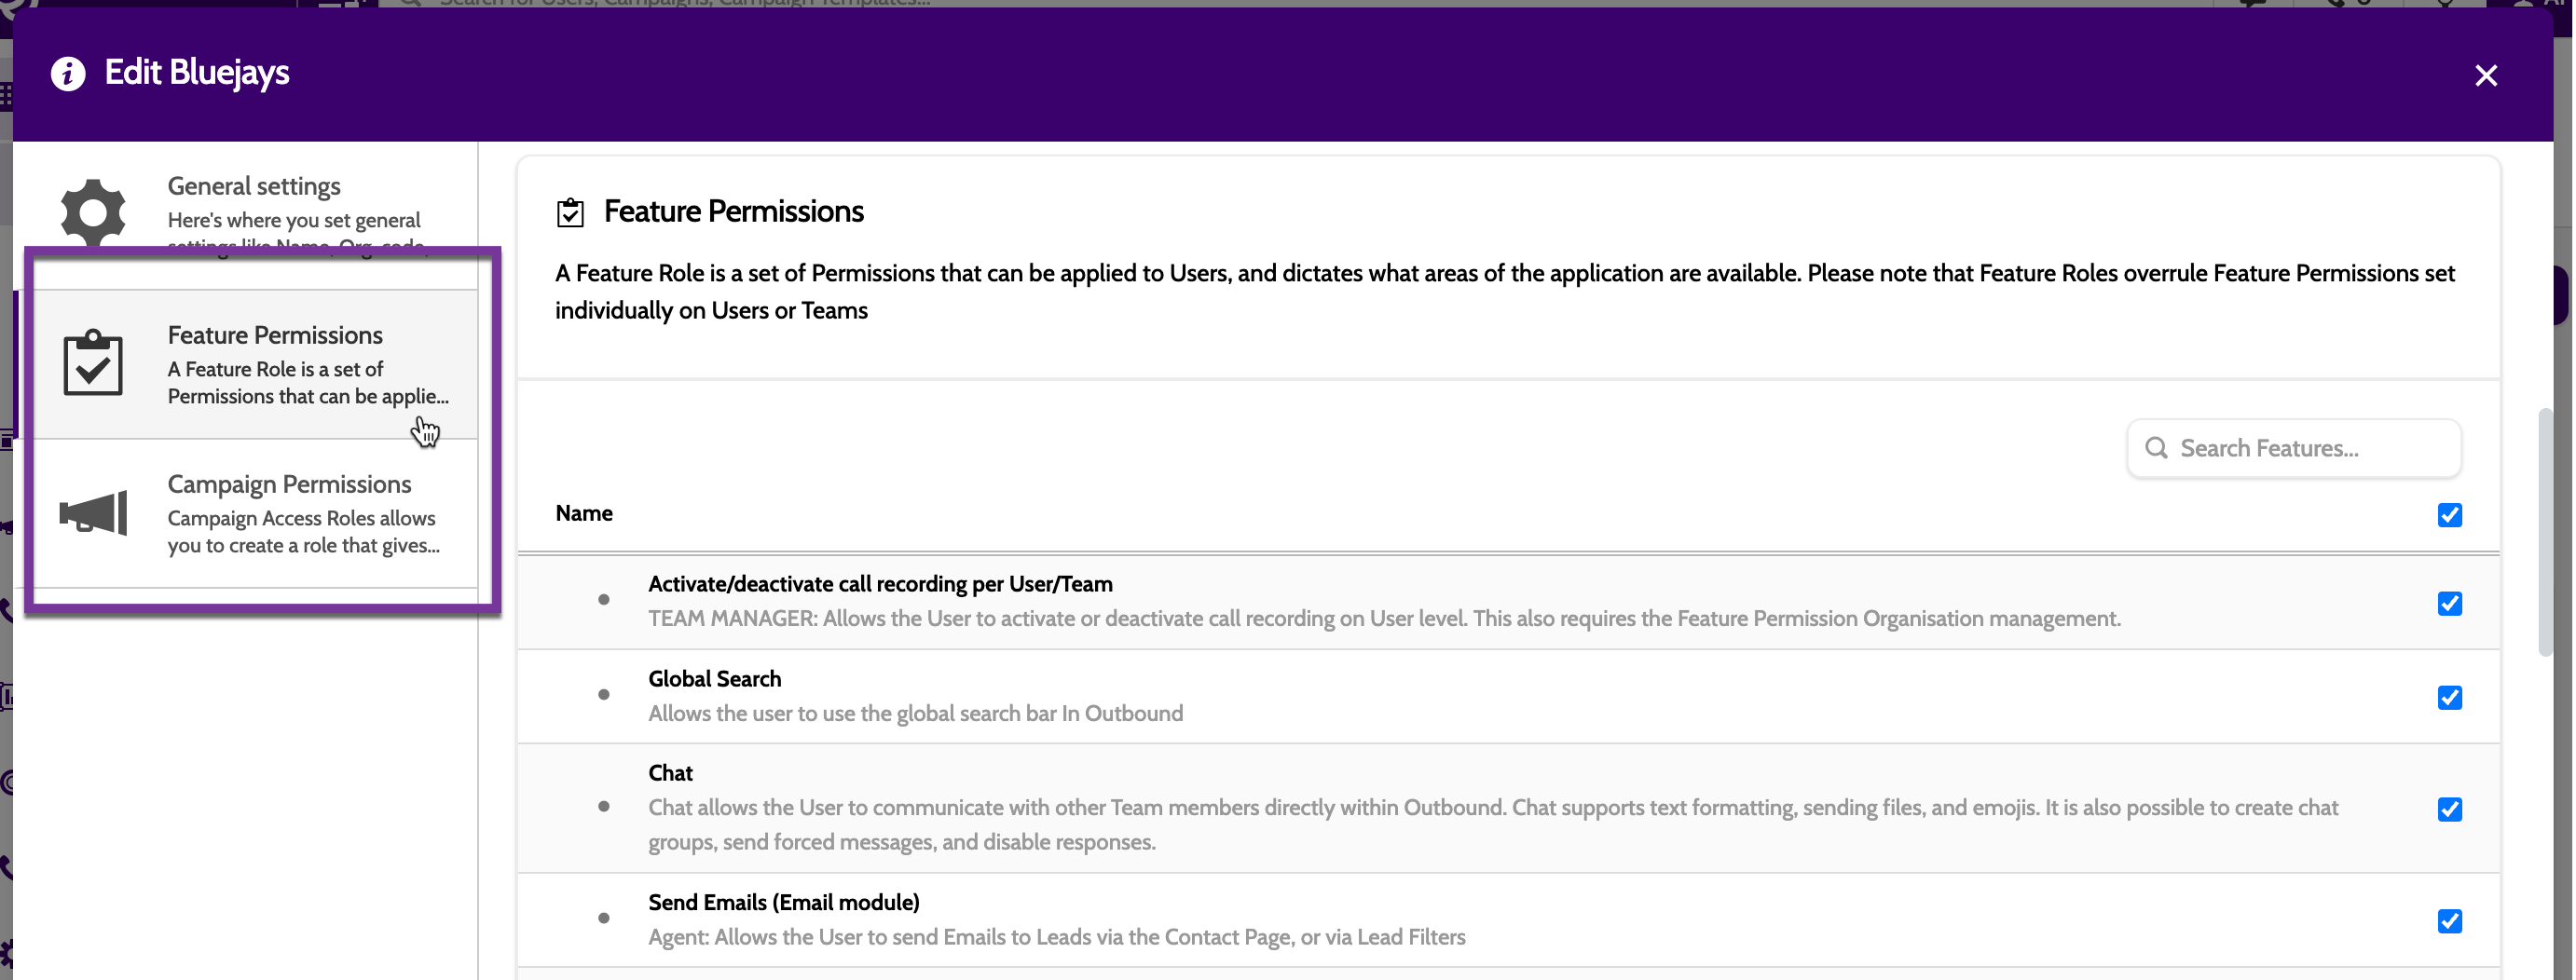
3. Assign Feature & Campaign Permissions
You can set permissions in two ways:
- When creating/editing a team or user
- Via Roles
- Select which permissions to assign to individual users or entire teams Click Save.
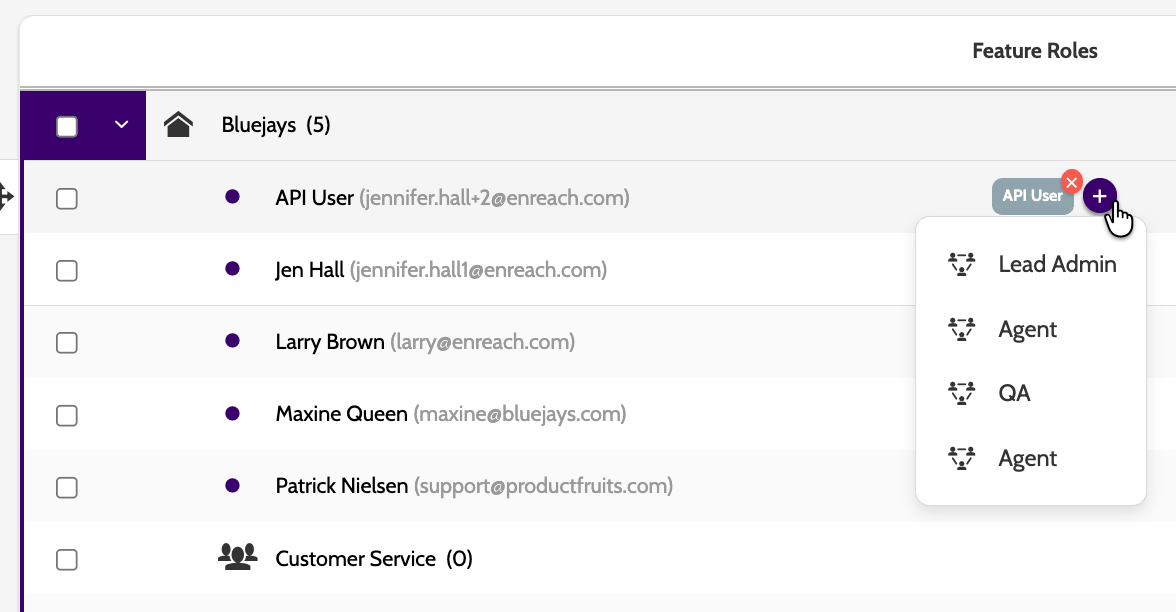
4. Creating and Assigning Roles
Roles override feature and campaign permissions. Use one system consistently!
Use pre-made roles, or customise your own.
- Click the plus icon to add a role to a team or user
- Feature Roles grant access to certain features, keeping access consistent, secure, and easy to manage at scale.
- Campaign Access Roles allocate campaign access to ensure the right individuals have the necessary permissions.
- Lead Priority Roles limits which leads an agent can get based on their assigned priority range, allowing you to route top‑priority leads to your best agents and balance workloads.
5. Manage Users
- To disable or edit a user: click the cog icon next to the user and choose an action.
- To reactivate a user: open the user → check Activate User → Save.
Billing considerations:
Adding or deactivating users may affect your billing model.
Before disabling a user:
- Transfer ownership of any private redials,
or ensure your campaign allows private redials to be released.
6. Manage Teams
- Teams can only be deleted if all users have been moved out.
- Team placement affects lead access and what information users can view.
Check it’s working
- You can see newly added teams and users in the organisation tree.
- Assigned permissions are visible in the permissions table.
- Users will see only the leads and features their role or hierarchy position allows.
Troubleshooting essentials
- If a user cannot see leads: check their team’s place in the hierarchy.
- If permissions seem incorrect: confirm that User Roles are not overriding team/user permissions.
- If a team cannot be deleted: ensure all users have been reassigned.
Last updated: 6/9/26, 11:28 AM