Campaigns: Lead Pools
Lead Pools is a platform for administrators to efficiently manage and upload large quantities of leads to campaigns. It also allows monitoring of lead performance within each designated pool.
What is a Lead Pool?
In Outbound, once you've created a Campaign and Campaign Template, you'll need to upload leads into a Lead Pool.
Lead pools are groups of leads that have been uploaded, either through a manual upload of a CSV file, an API request, or manually entered by a user. These groups of leads are all placed into unique lead pools that can be tied to a campaign.
Managing lead pools
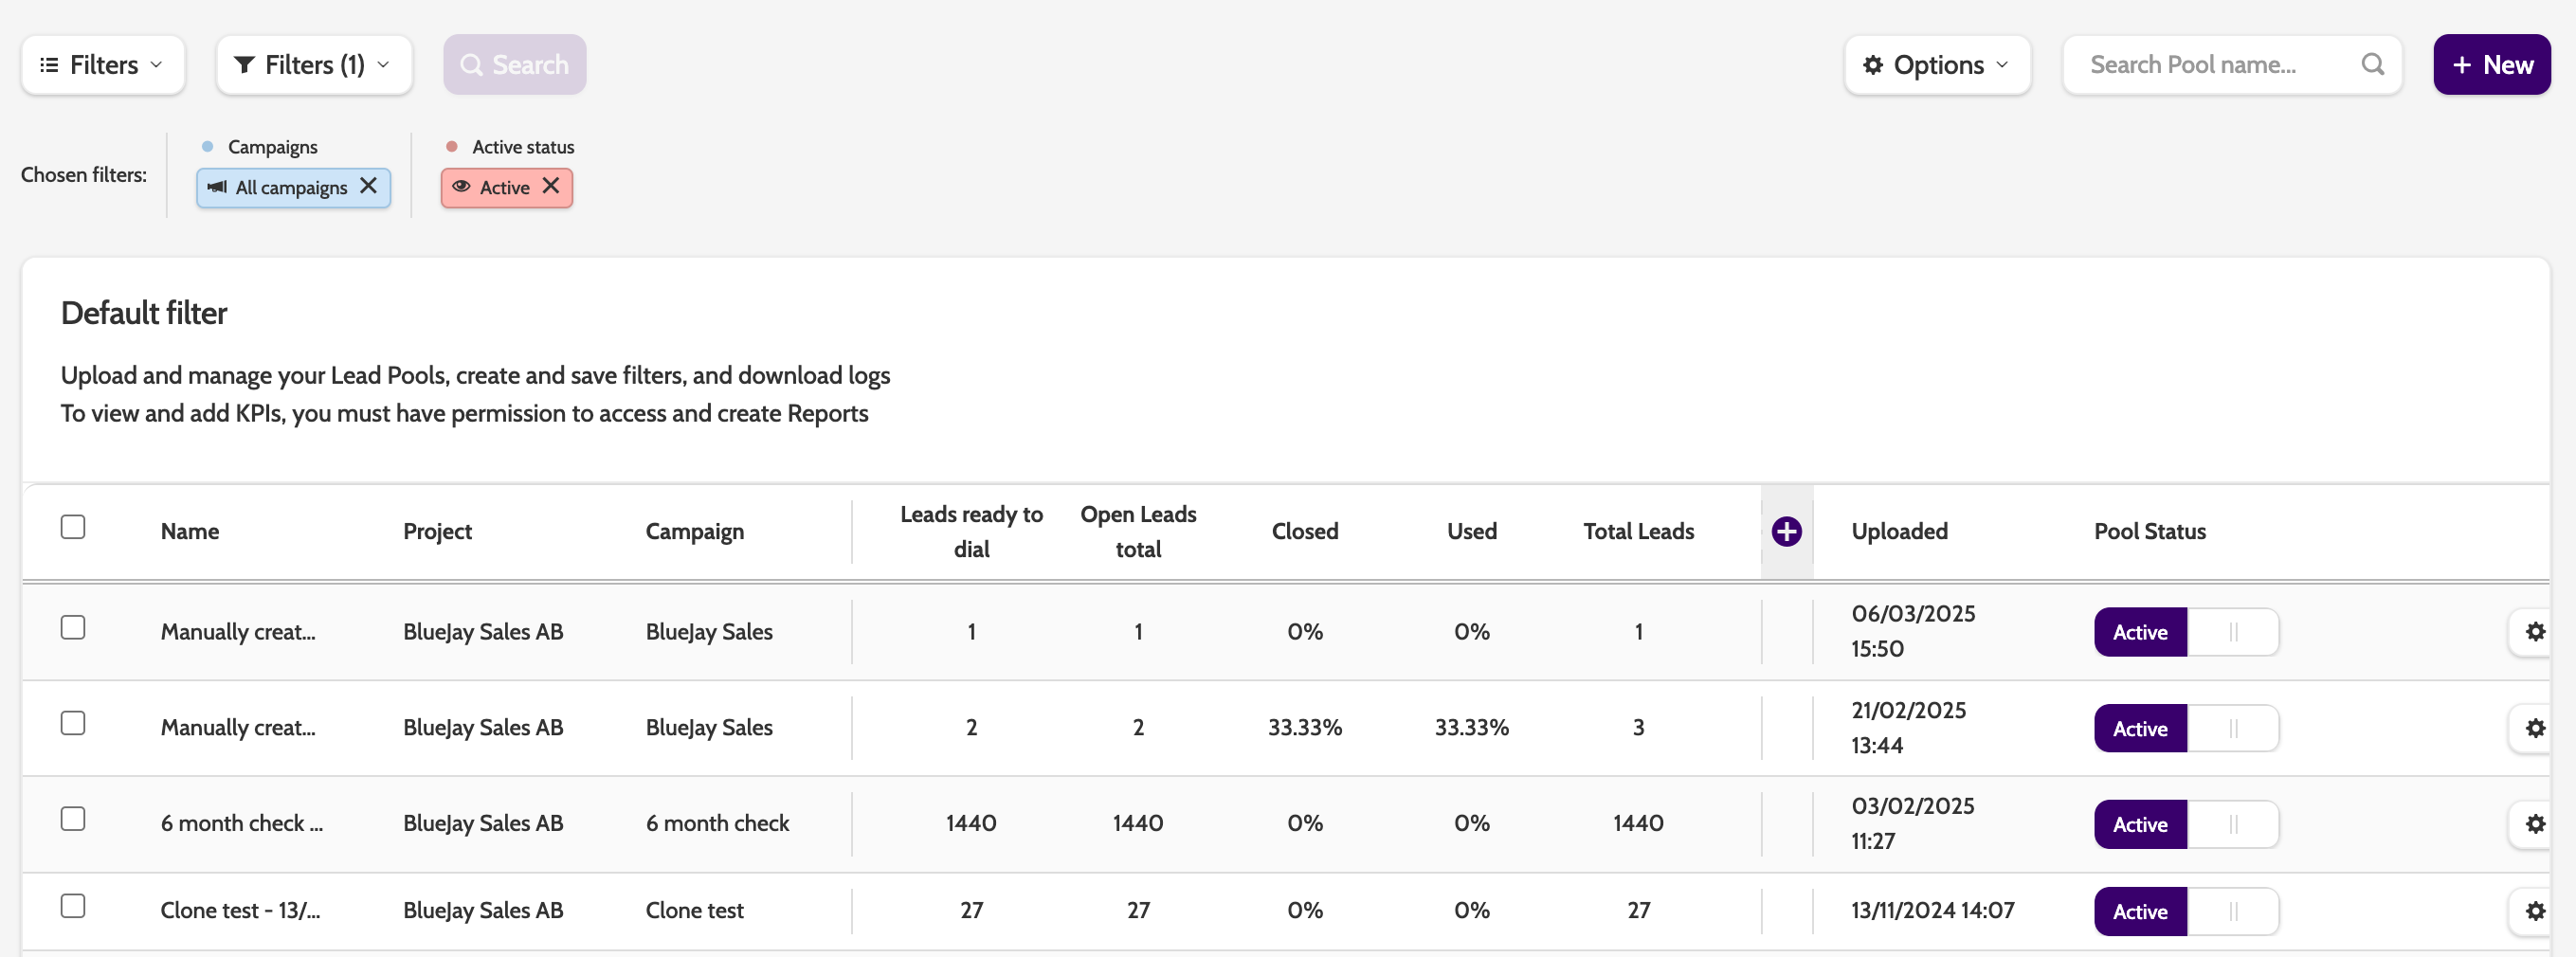
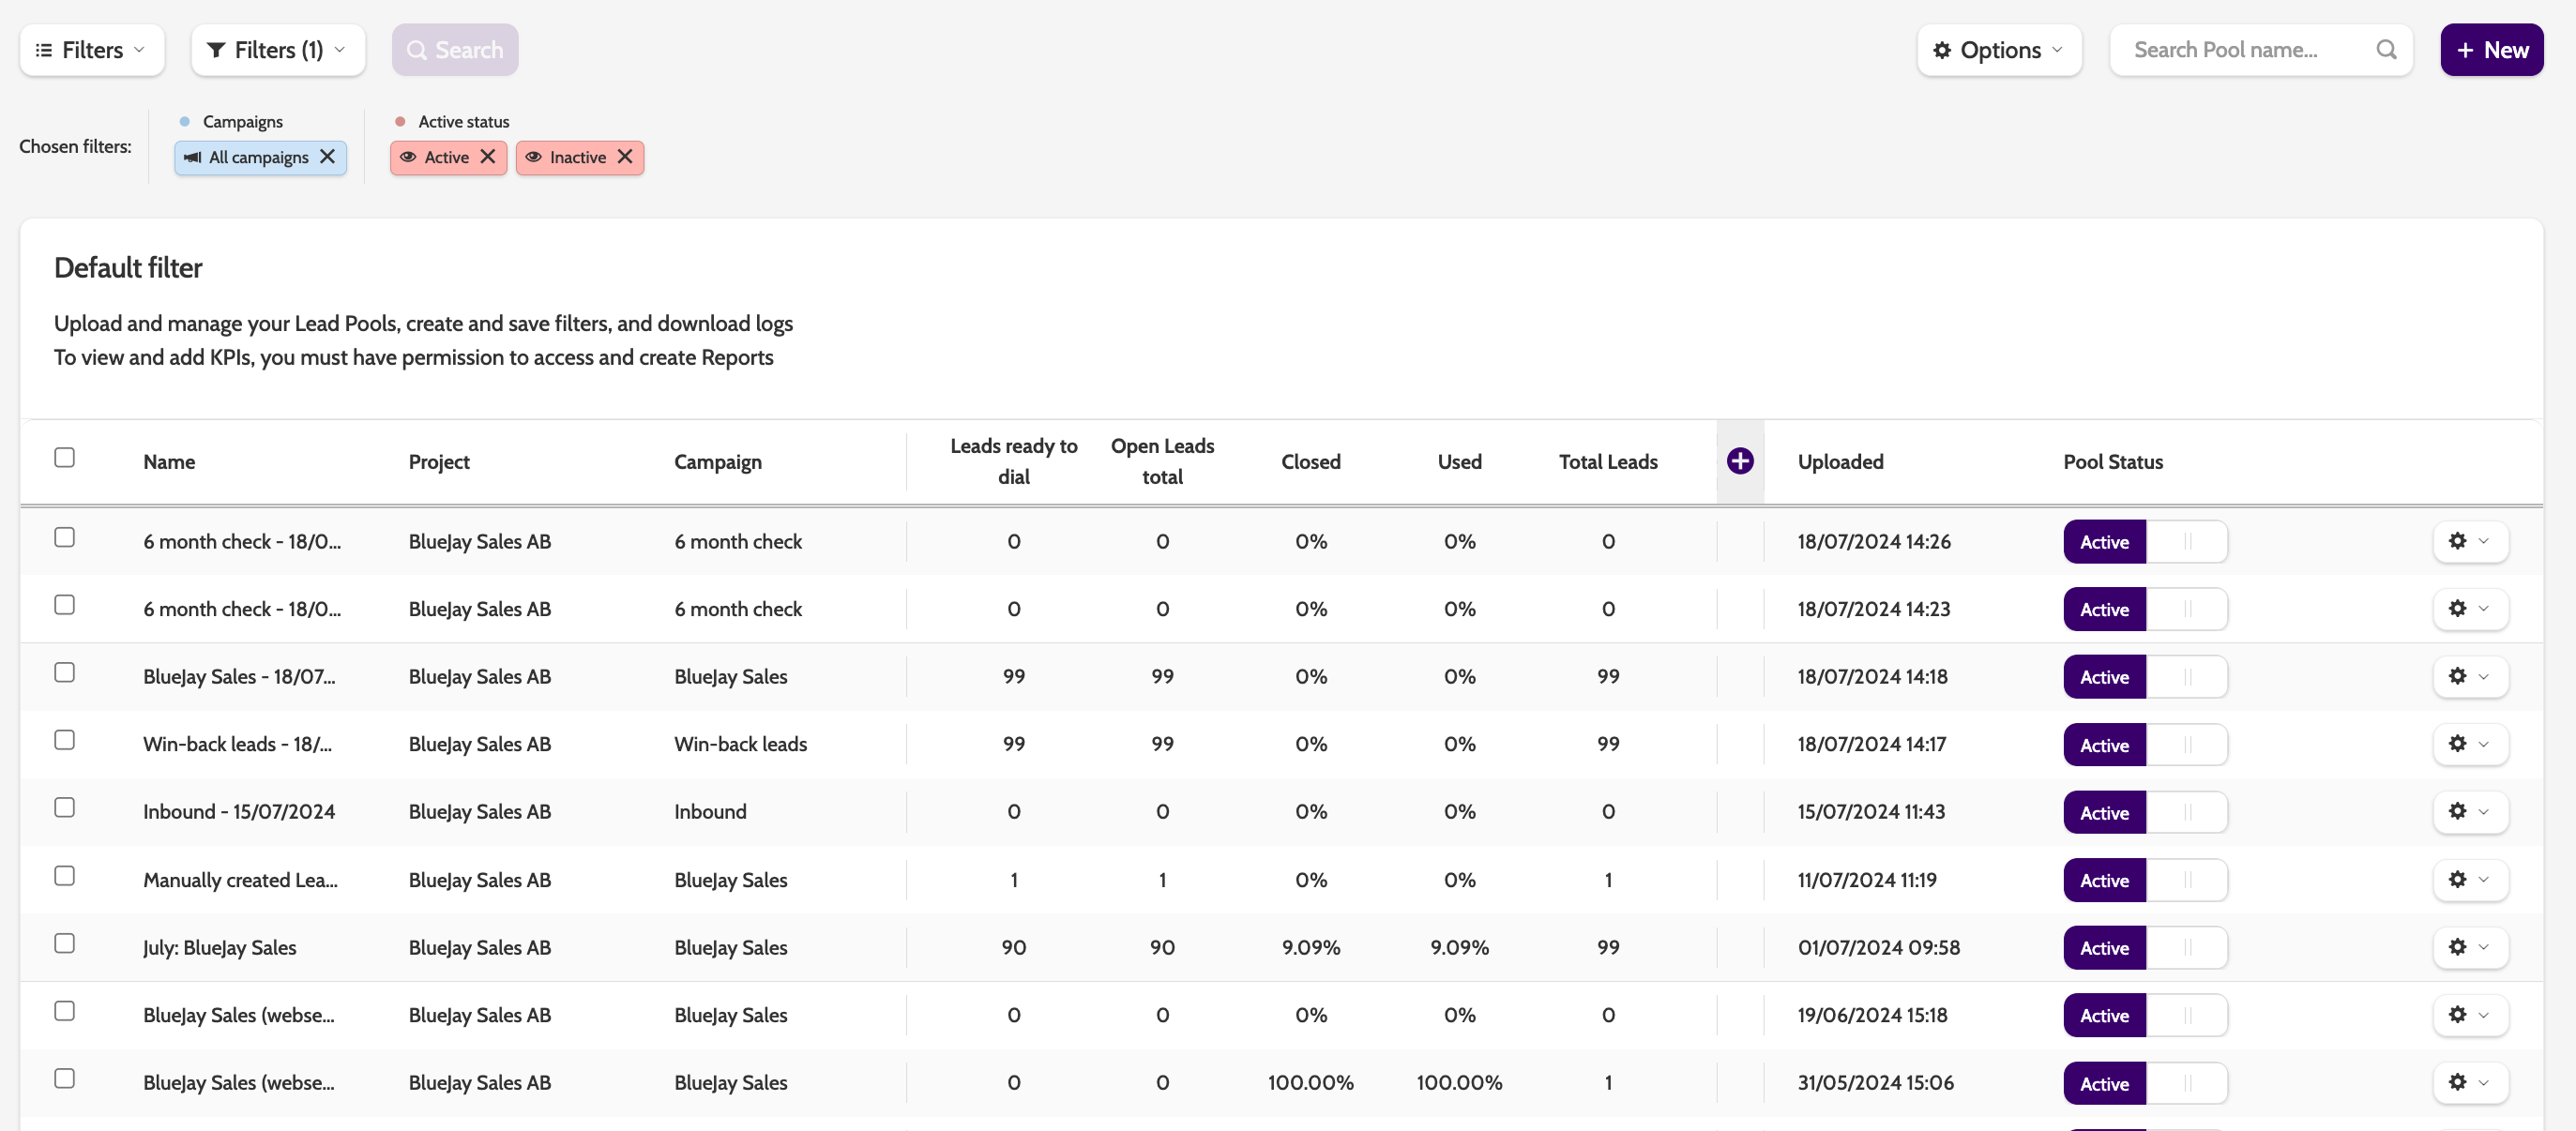
Lead Pools can be found under the Campaigns menu.
In the navigation page you can view every lead pool that has been uploaded by your organisation, and check the status.
Along the top of the lead pool view, you can see basic information about each lead pool.
- Lead pool name
- The project it belongs to
- The campaign it belongs to
- The number of leads ready to dial
- The number of total open leads
- The percentage of closed leads
- The percentage of used leads
- The overall total number of leads
- The date it was uploaded
- The lead pool status - Active, Inactive.
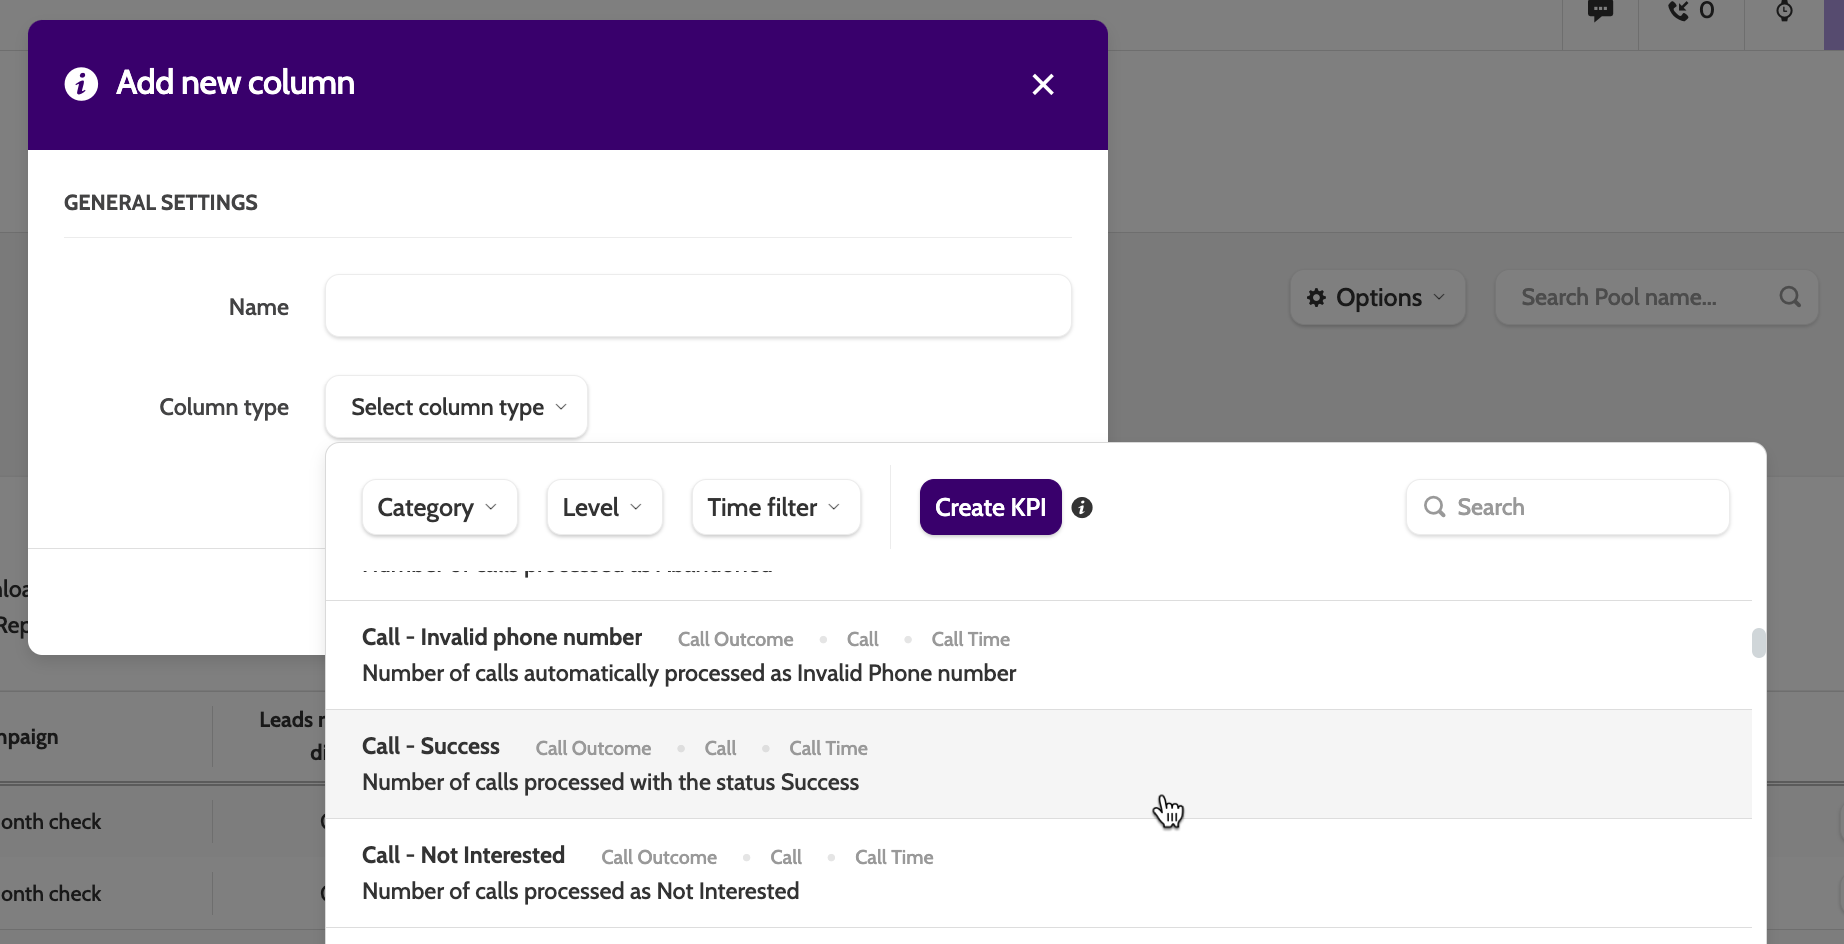
Click the plus icon to add a KPI to your lead pool filter, and get more in-depth performance statistics at a glance.
To filter the lead pool view, expand the filters menu, select which projects or campaign you want to view, and the active or inactive status.
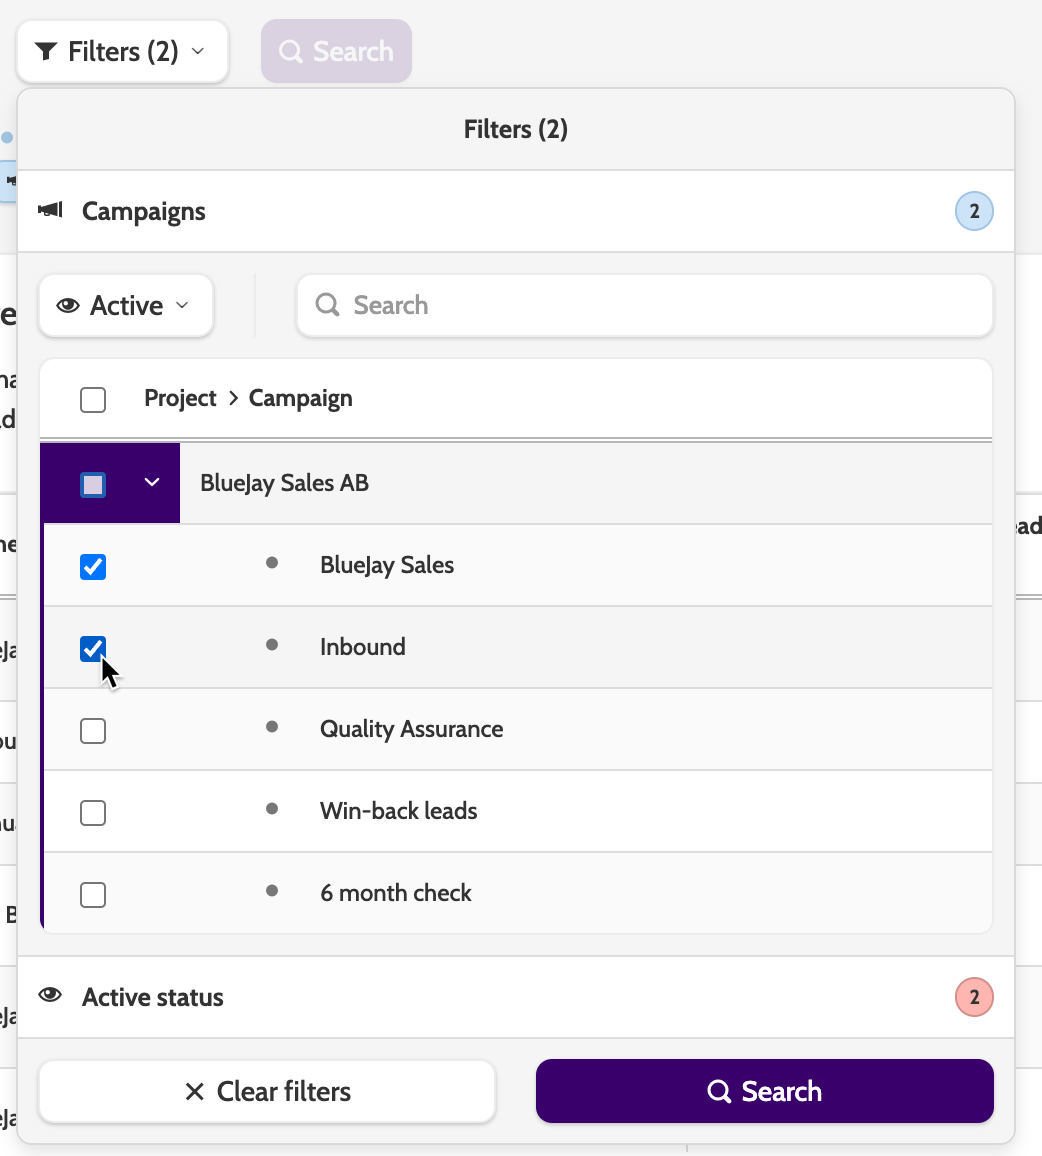
After creating the filter, click options and save.
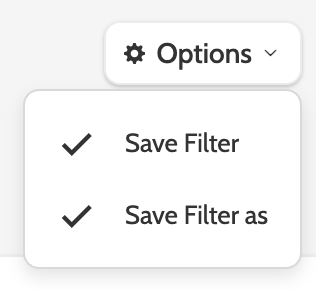
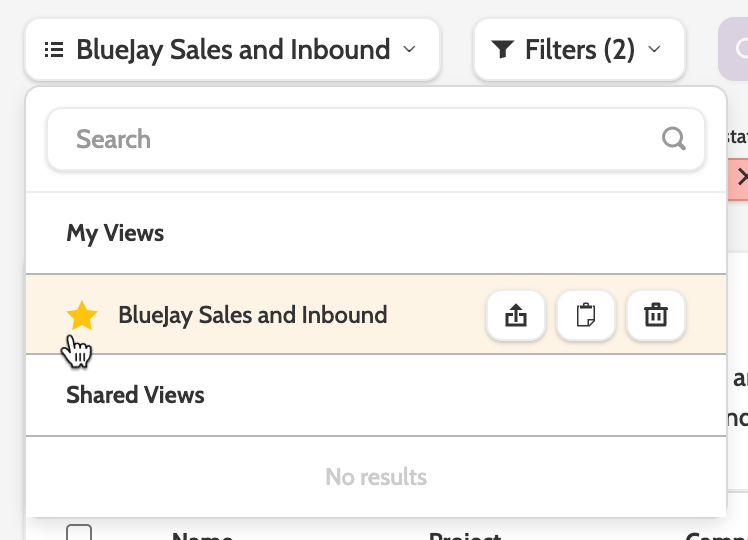
The filter will be saved under My Views, and can be copied, shared with other users in your organisation, or starred so it will open as default.
Use the search bar for specific lead pools, or click + New to create a new one.

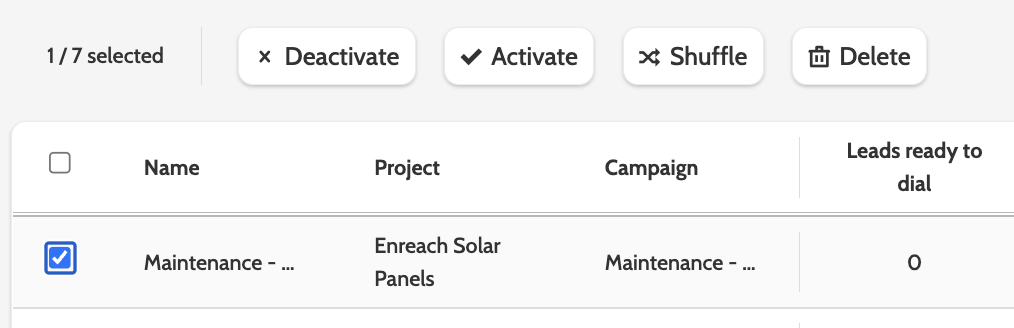
There are several actions perform with lead pools. Simply check the box next to the lead pools you wish to work, and choose one of the follow options at the bottom of the page:
- Deactivate: this will set the lead pool status to Inactive. Leads with VIP and private redials will still be called at the set dial time even if in an inactive lead pool
- Activate: this will activate an inactive lead pool
- Shuffle: by default, leads will be called in the order they they were organised in the upload file. Click shuffle to randomise the order the leads will be called in
- Delete: click delete to delete all unprocessed leads in the lead pool. Please note that master leads can't be deleted as long as their clones are still in use elsewhere.
Lead pool details
To edit and view the details of your lead pool, expand the cog icon.
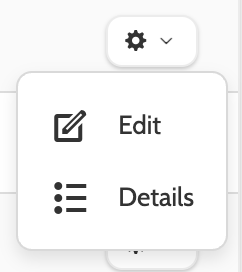
Under edit lead pool, you can edit the general settings:
- Name: edit the name of your lead pool
- Description: add a description field to add any important details about the lead pool
- Active dates: set the date span in which the lead pool is active. Please note that leads with VIP and private redial status will still be called even if the lead pool is inactive.
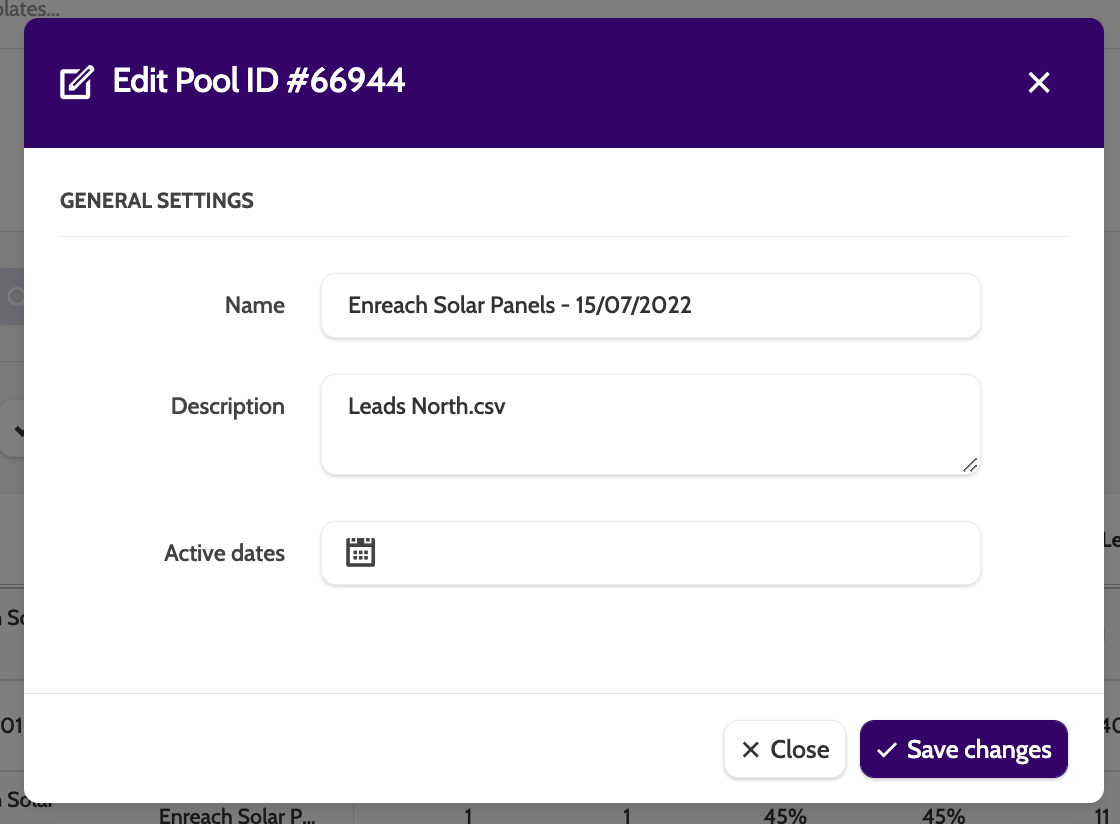
Under details, you can view detailed information about the lead pool, and download the data as a CSV file:
- Lead Pool ID: this ID used by Outbound to identify the lead pool. If you contact support with a question about lead pools, we may ask for this ID
- Campaign Name: the name of the campaign to which the lead pool was uploaded
- Campaign Code: the code that is used for API requests
- Campaign ID: this is the ID of the campaign to which the lead pool was uploaded
- Project: this tells you to which project the campaign and the lead pool belongs
- Description: the description field for this lead pool
- Valid Leads: the number of valid leads in the lead pool
- Invalid Leads in Upload: the number of invalid leads in that weren't uploaded, because they didn’t match the criteria set by the upload rules for this campaign
- Priority: the priority the leads in this lead pool were set to when uploaded
- Duplicate check: the master data field that was selected for checking duplicates on upload. Does not check for duplicates in deactivated lead pools
- Duplicate processing: the method you have chosen to handle duplicate leads
- Last modified: the date the lead pool was last modified
- Last Modified by: the name of the agent who last modified the lead pool
- Download Invalid Leads: downloads a CSV file containing information about invalid leads, and why they are invalid
- Download Duplicates: downloads a CSV file containing information about duplicate leads, according to the duplicate check settings
- Download full log: download the full log for this lead pool
- Active period: the active date periods for the lead pool, if set
- Export Lead Pool statistics: downloads a CSV file of all the lead pool statistics shown below
- Total Leads in Pool: the total number of leads
- Locked Leads: the number of locked leads in the pool. A lead is locked when it is on the contact page, it is being edited, or it's in a predictive dialer campaign that is actively being called
- Open Inactive Leads: the number of leads that have been made inactive, either individually or via the deactivation of a lead pool, but the lead status is open.
Upload lead pool
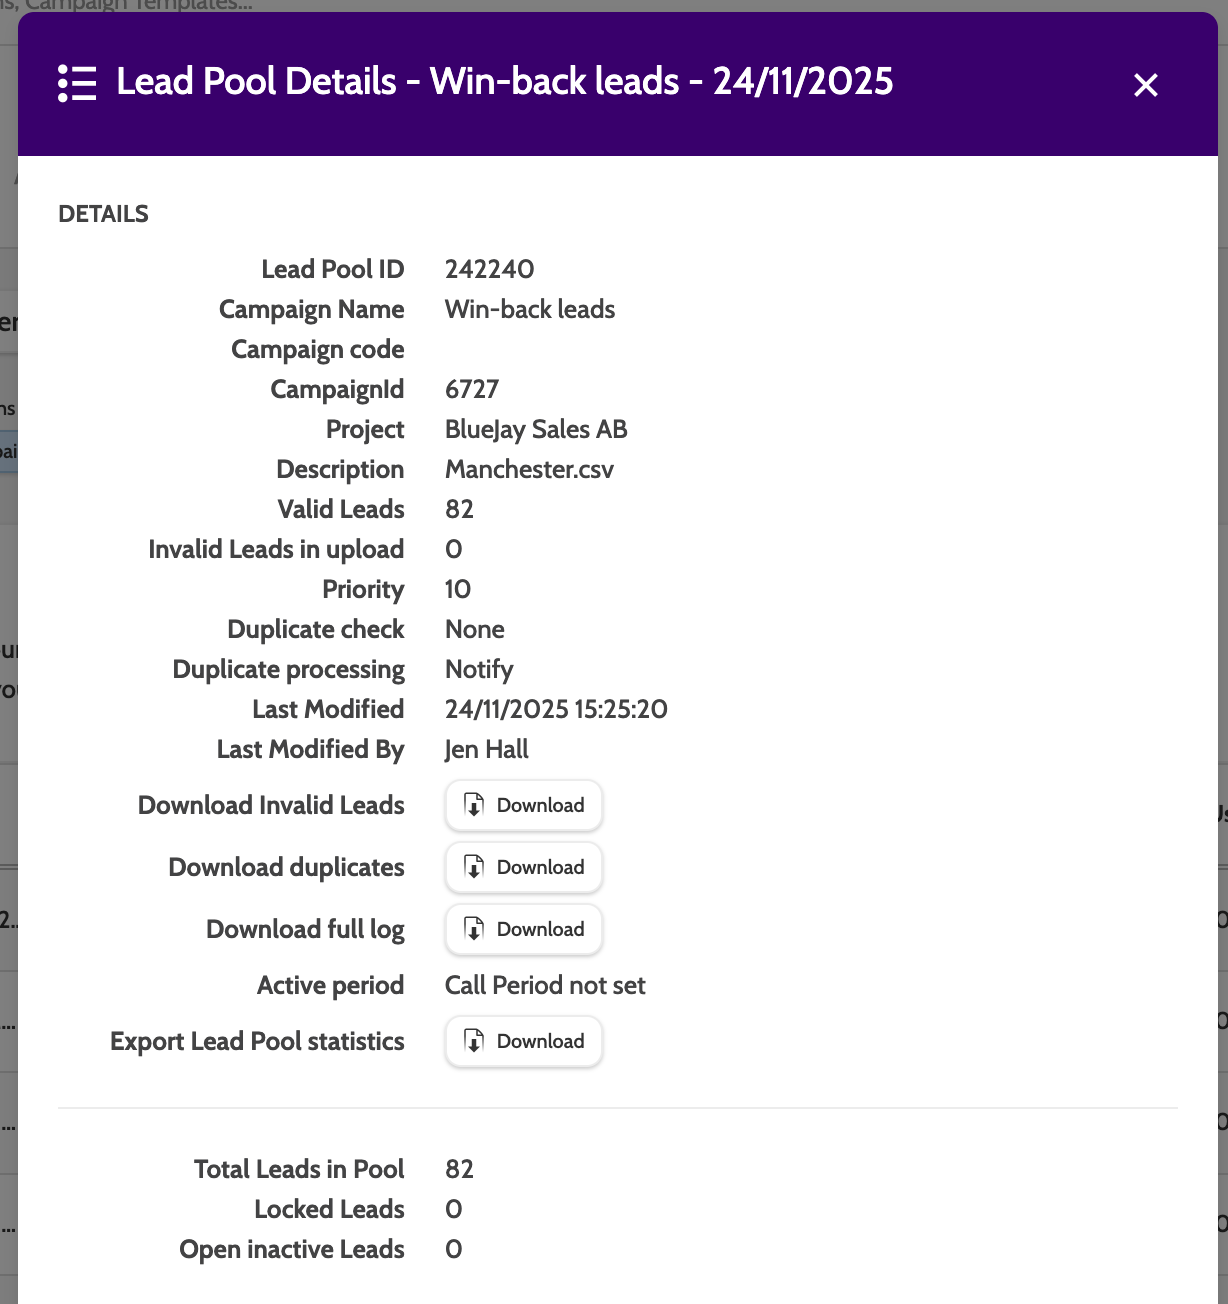
To upload a new lead pool, click the New button.

The upload wizard will open.
Upload Settings
Under Upload settings, configure the basic settings for your lead pool. Mandatory fields are marked with a red asterisk:
- Campaign: expand the drop-down menu and select which campaign you want to upload the lead pool to
- Lead Owner of leads in pool: select which teams or user from your organisation will be the lead owner
- Pool Name: enter a name for your lead pool. If this is left blank then the lead pool name will be the same as the upload file name
- Pool Description: enter a description of the lead pool, for internal use only.
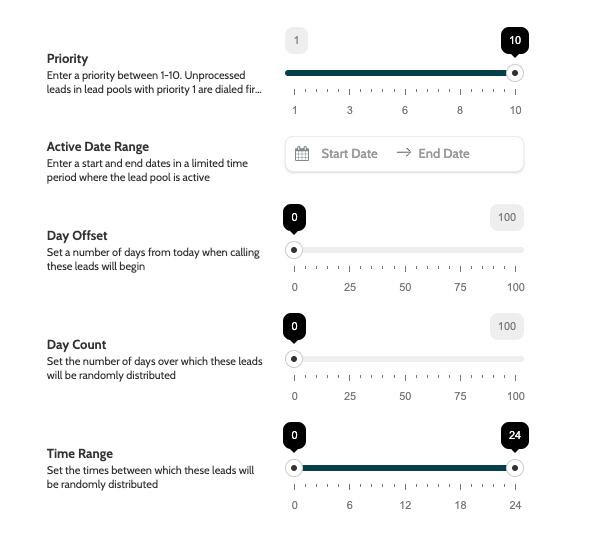
Click Show Advanced Settings to view more options:
- Priority: a priority for uploaded leads. Read more about dialer priority here
- Active Date Range: a start and end date in which the leads will be active
- Day Offset: the number of days between uploading the lead pool, and when the leads can be used
- Day Count: the number of day which the leads will be randomly distributed over
- Time Rage: set the time range in which the leads can be distributed and called.
Click Next to continue to the next step.

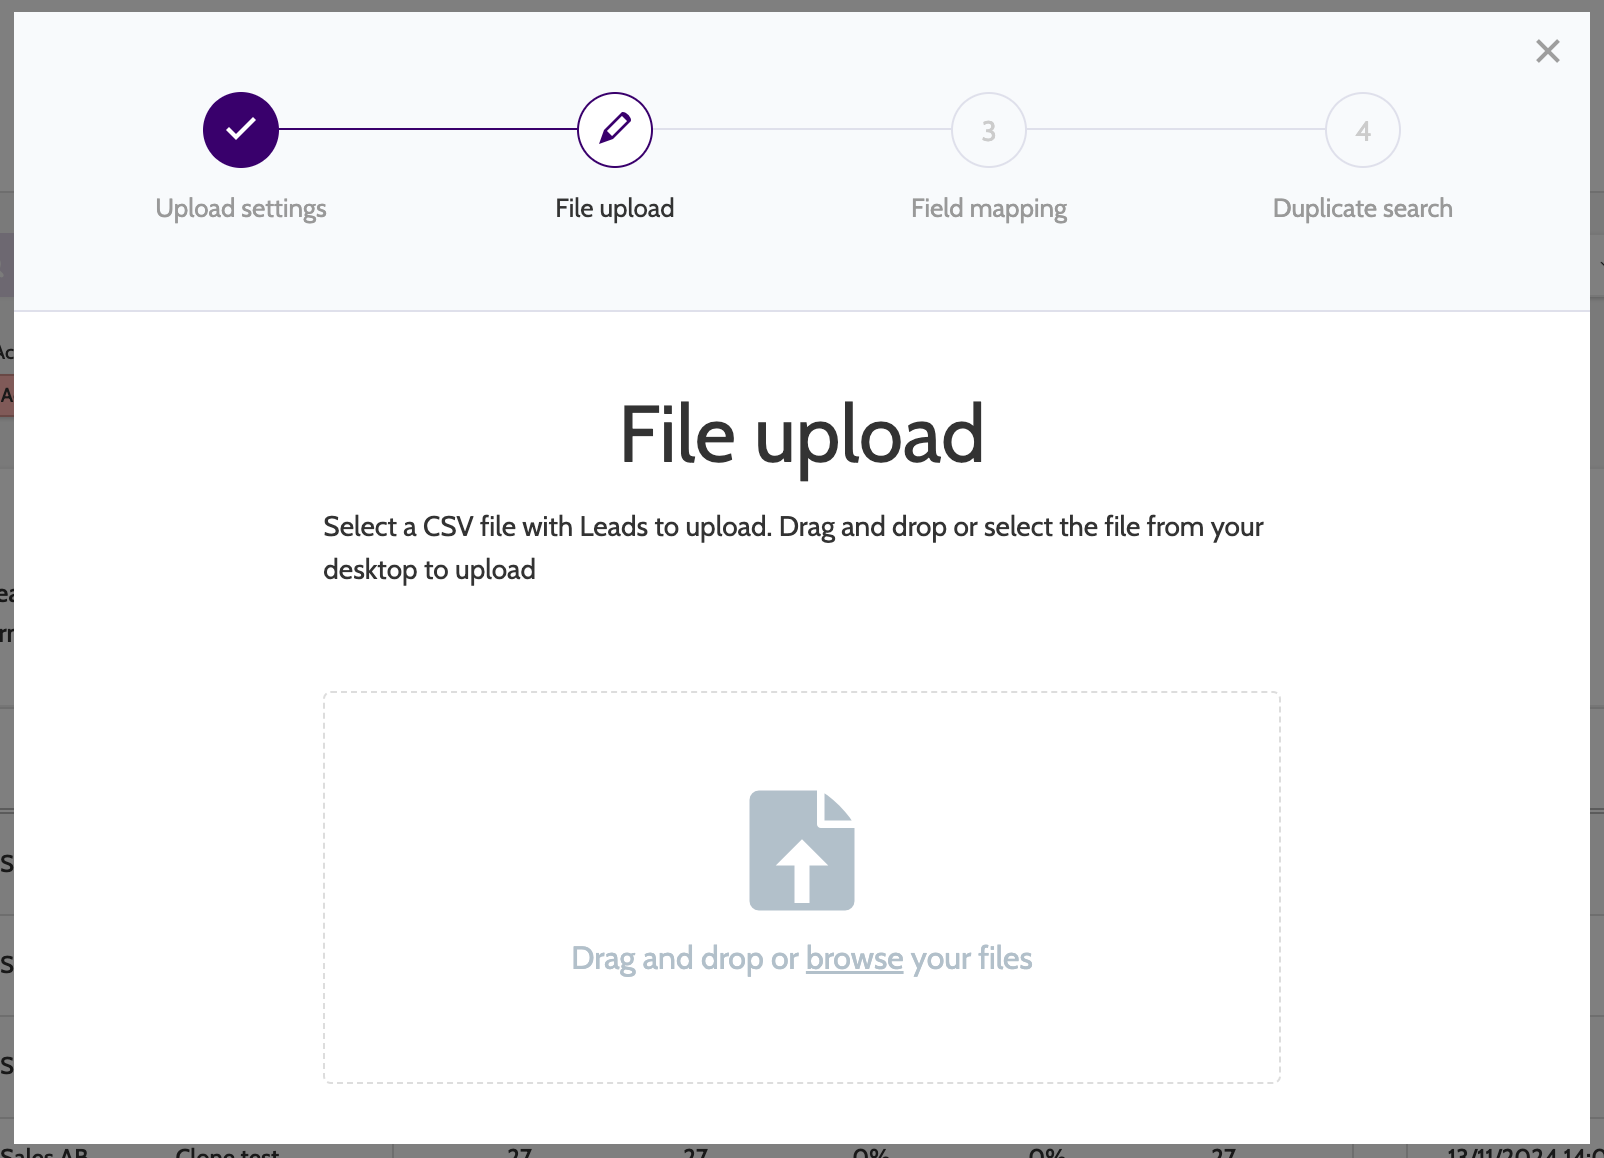
File upload
In step 2, upload the CSV file containing all the lead data you want to upload.
Upload a file from your computer, or drag and drop the file inside the border.
Please note that when uploading a CSV file of leads, each lead has to have a phone number.
Leads can't be uploaded without a phone number!
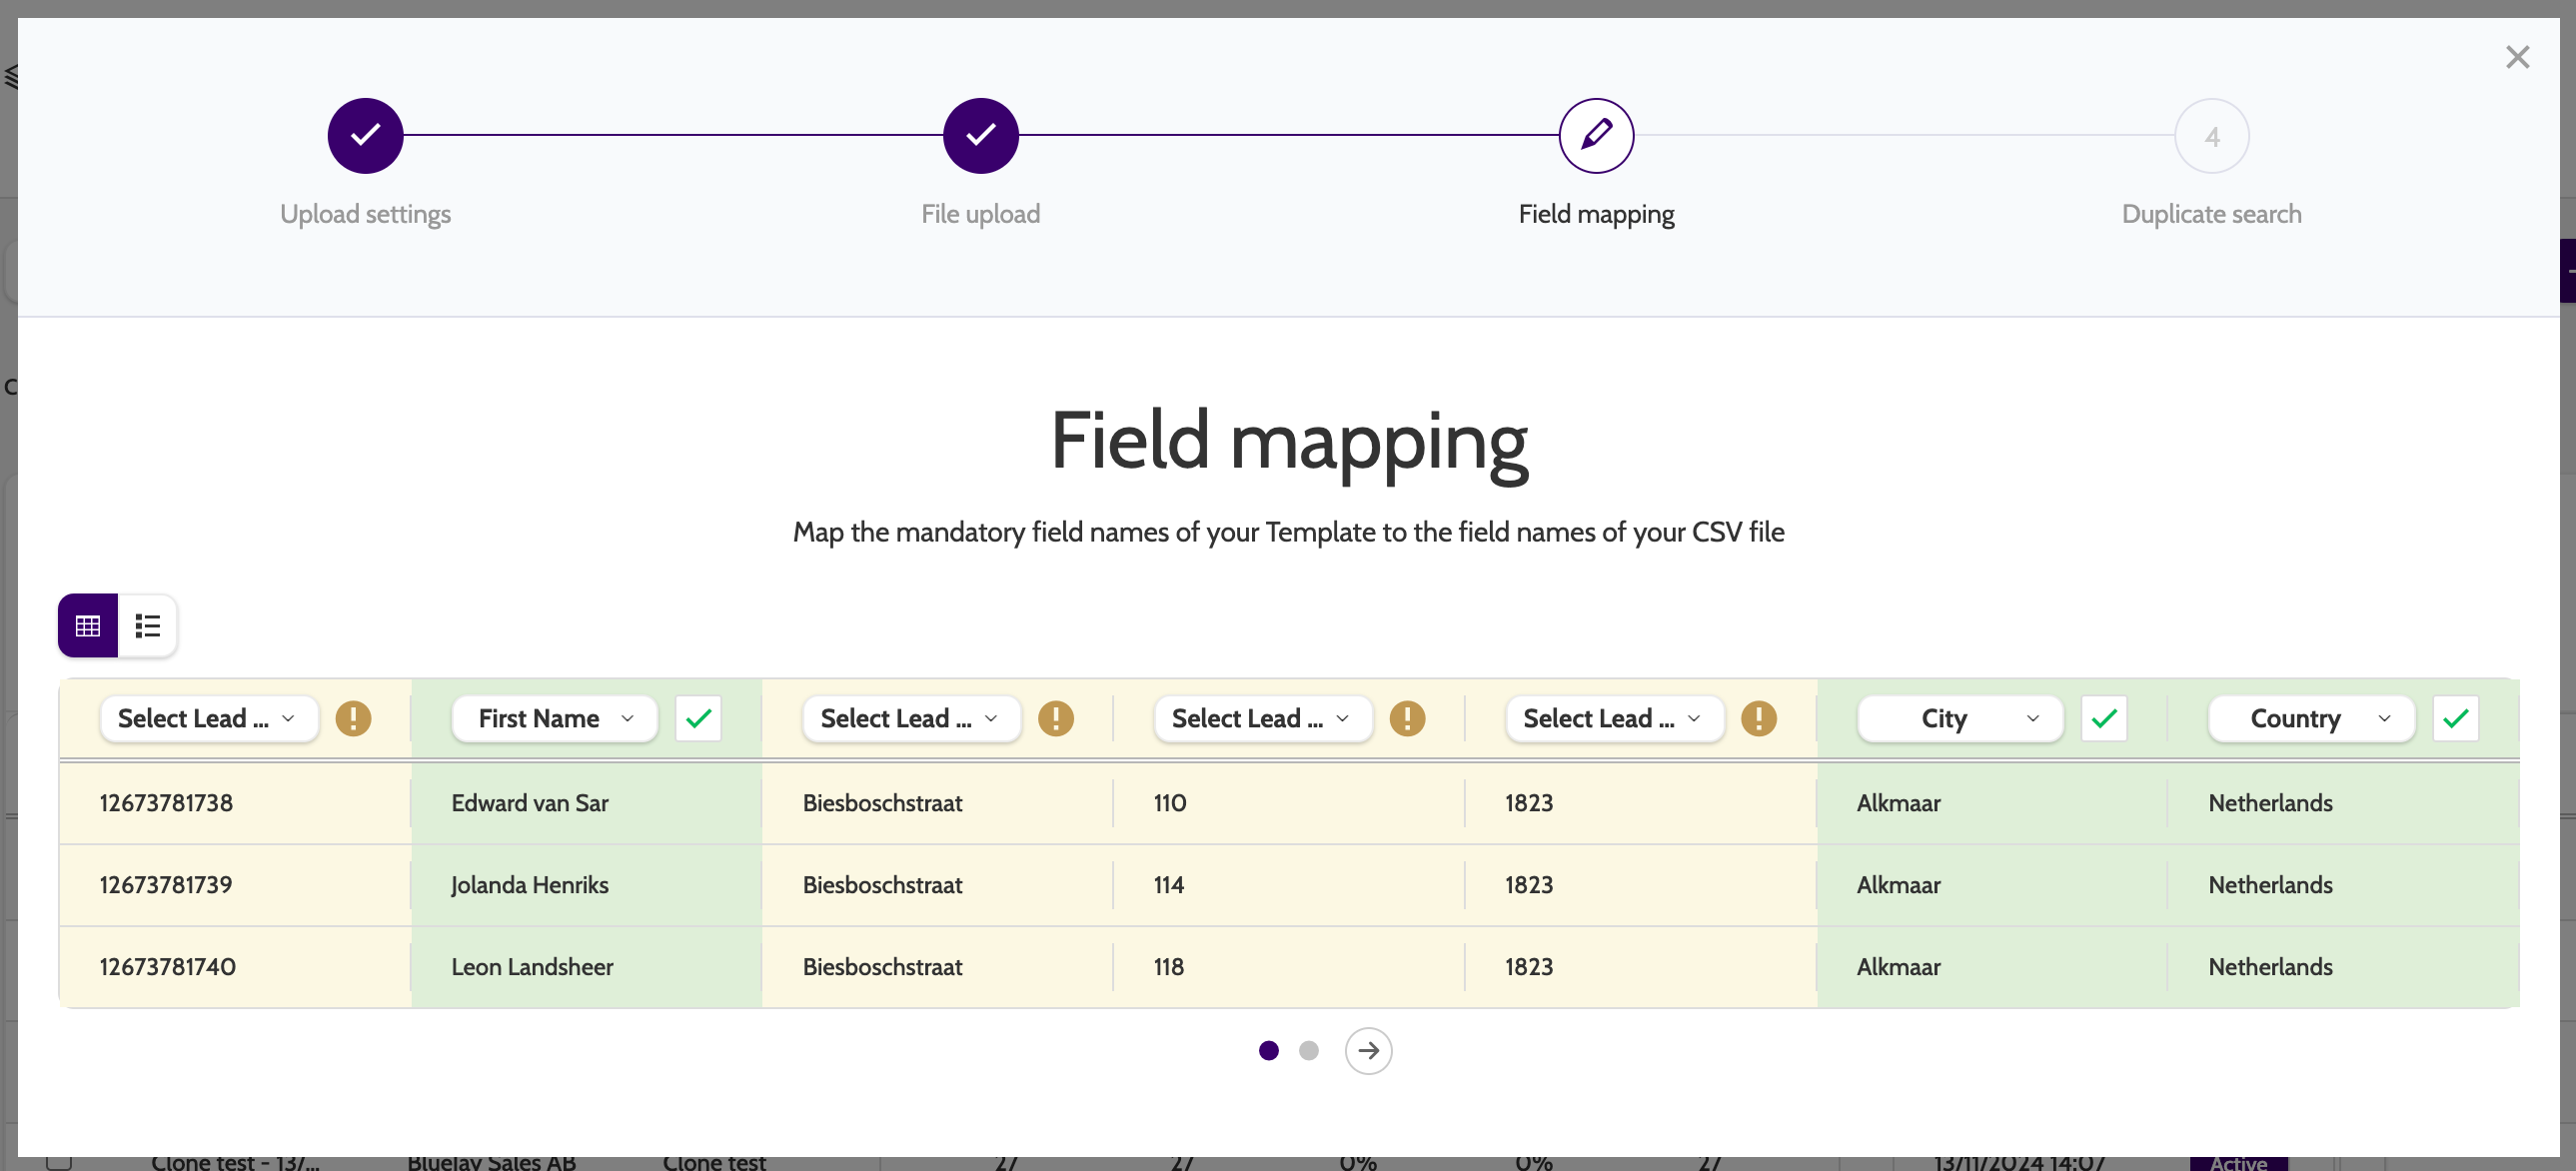
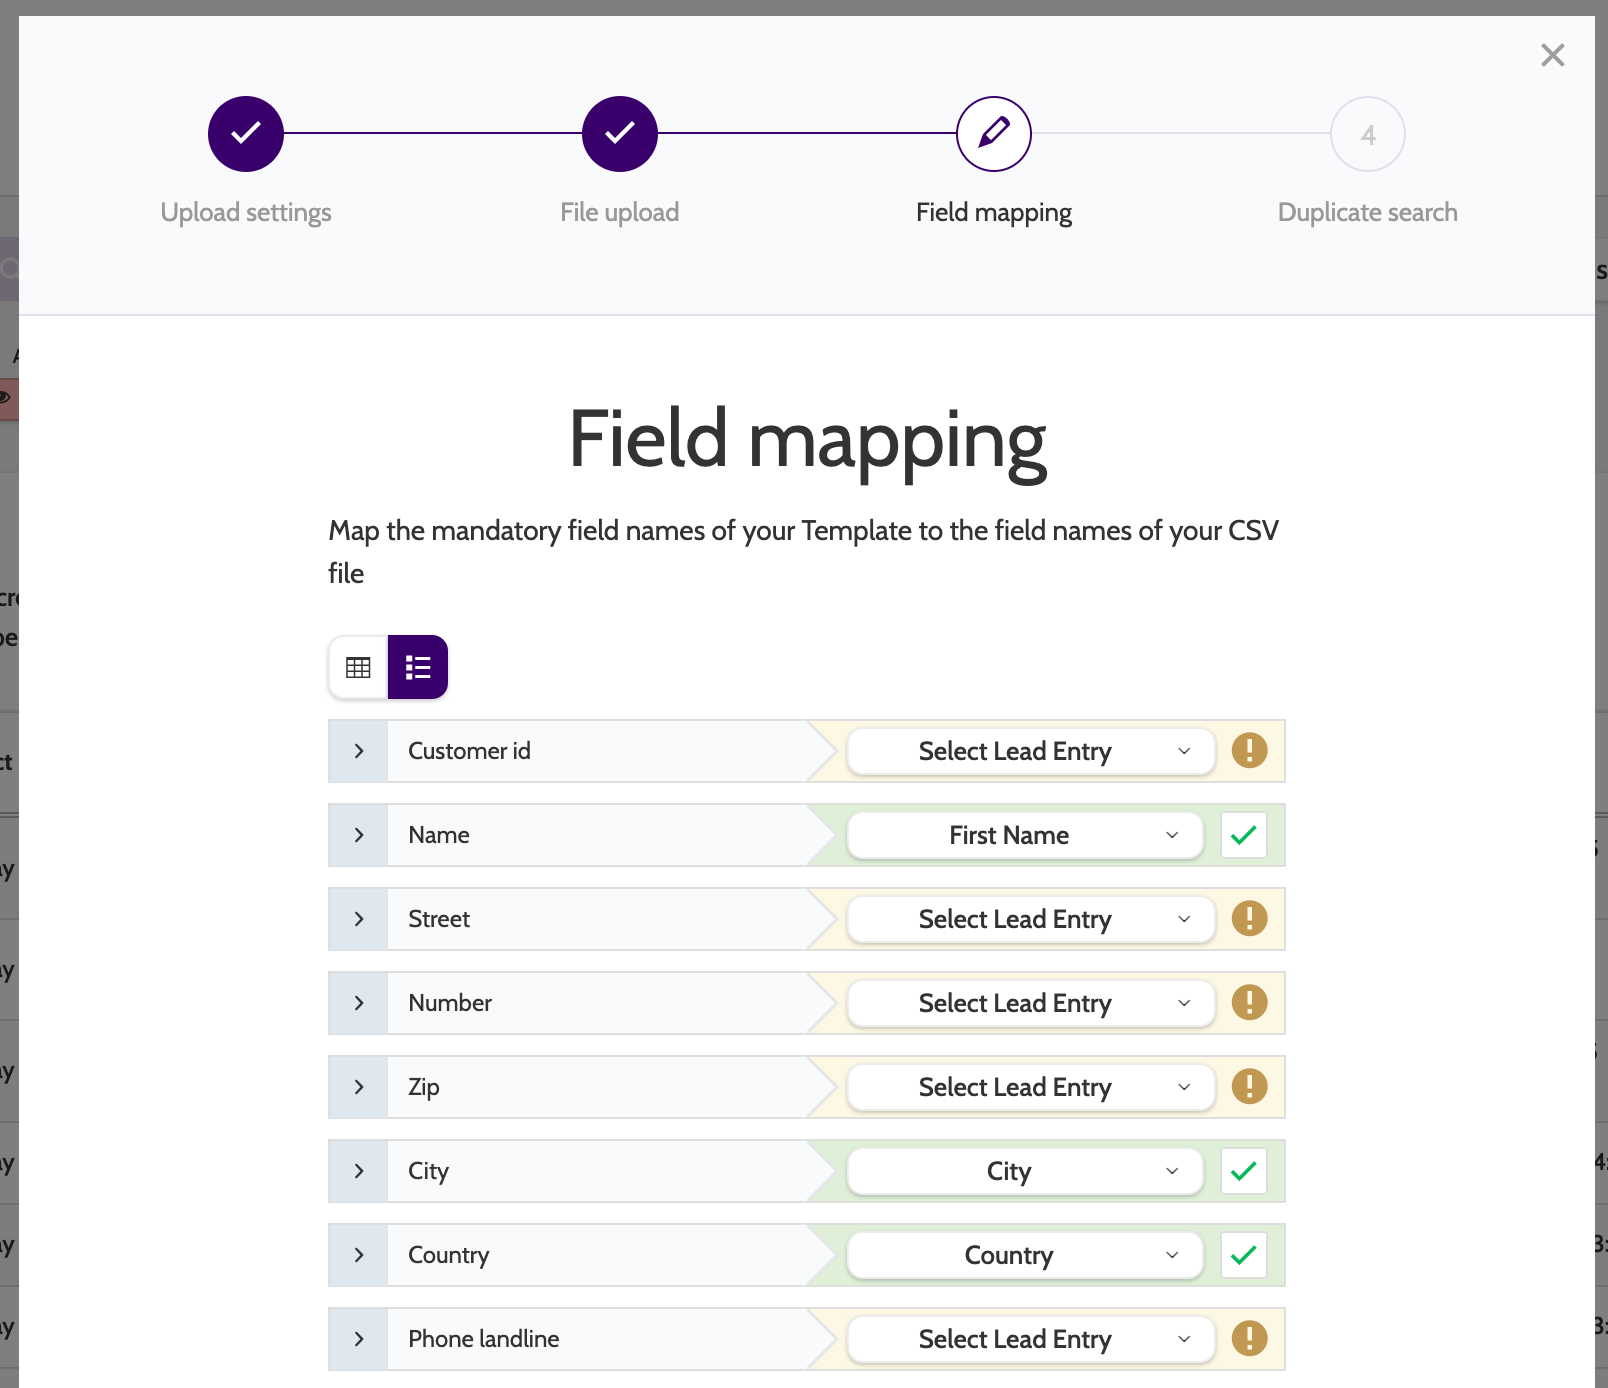
Field mapping
In step 3, you will map the fields of your campaign template to those in your CSV file.
When you have uploaded your lead pool, the field mapping stage will look like the image below.
Each column from the CSV file will be displayed in its own yellow column, signifying that it hasn't yet been mapped, with a drop-down menu containing master data fields from the campaign template:
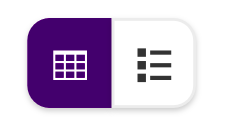
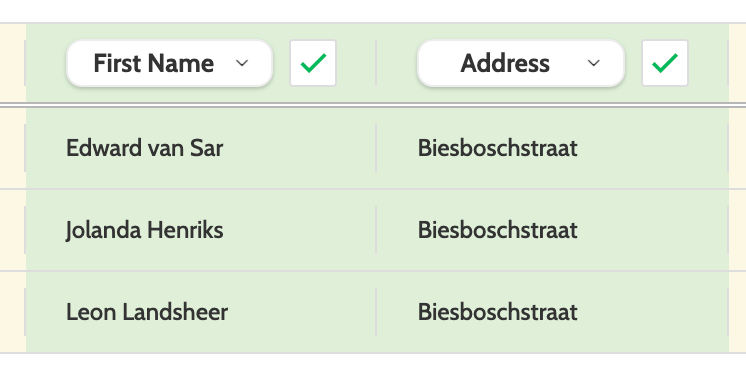
Switch to a list view by clicking the list icon.
The list view will display each column like so:
To map a field to a master data field, click to expand the drop-down menu, and select which field you want to map it to.
Note that not all fields need to be mapped, but you do need to map a duplicate field that will be used to search for duplicate entries (usually a phone number). When you have successfully mapped the duplicate field, the red warning box will disappear:

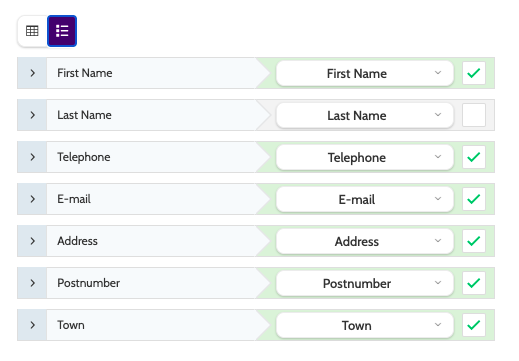
When you have correctly mapped the fields, the column will be displayed in green, with a green tick.
The list view will display correctly mapped fields like so:
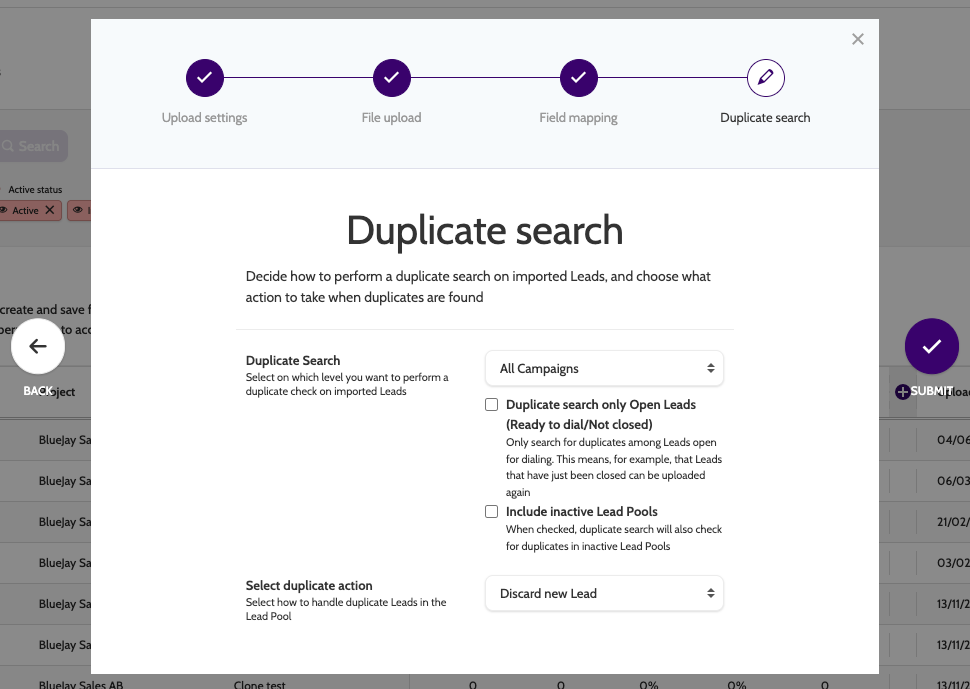
Duplicate Search
In step 4, configure how you want to search for duplicate leads, and what to do when duplicates are found.
- Duplicate Search: select the scope to perform a duplicate search on. Choose between None, This Campaign, Projects, and All Campaigns
- Duplicate Search only Open Leads: check this box to only perform the search on open leads
- Include inactive Lead Pools: Check to search across inactive lead pools
- Select Duplicate Action: select how to deal with duplicates that are found. Choose between Notify, Discard New Lead, Deactivate Existing Lead (only allowed on open Leads), and Set Status to 'Removed' on Existing Lead (only allowed on open Leads).
Please note that any option chosen in duplicate search will disregard all inactive leads, regardless of the status of the campaign or lead pool they are in.
When you have finished click Submit.
Outbound will import 200 Leads in one go, regardless of how many will be uploaded in total - this ensures a smooth and quick upload.
While the Leads are importing you will see a status update, and the following message when completed:
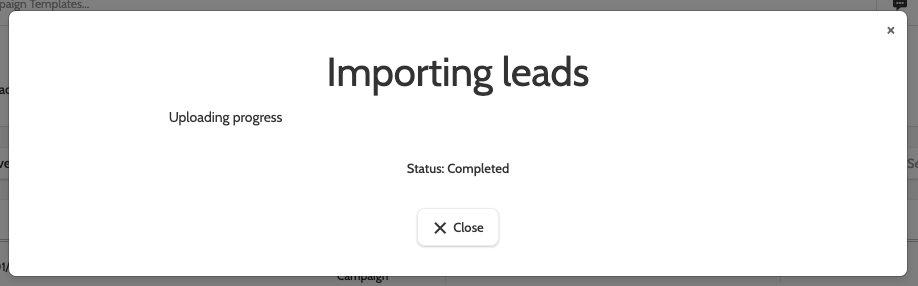
Click close to return to the lead pool navigation page, where you can view your newly uploaded lead pool.