Quickstart: Triggers
Before you start
- You should already have campaigns and trigger actions created before building triggers
- You need to be an Admin or have the Campaign Triggers feature permission to create and edit triggers.
Step-by-step
1. Understand Triggers & Trigger Actions
A Trigger in Outbound is an automation rule that runs when a lead meets certain conditions, and then performs a predefined action.
It’s always two parts: the trigger (conditions) + the trigger action (what happens).
- A Campaign Trigger watches for certain conditions or lead interactions (e.g., status changes, field values)
- A Trigger Action defines what happens when the trigger conditions are met
- Actions include:
- Clone the lead to another campaign
- Send an email
- Send an SMS
- Make an HTTP request to an external system (e.g., CRM)
- Modify lead status, owner, data fields, or schedule a redial
2. Create Trigger Actions (Prerequisite)
- Go to the Campaigns > Campaign Triggers
- Go to Manage Trigger Actions to create actions like:
- Clone Lead — duplicate a lead to another campaign with custom settings
- Send Email — send automated emails using templates
- Send SMS — send automated SMS messages
- Make HTTP Request — call external APIs (e.g., CRM integration)
- Modify Lead — update lead data fields, change status, set redials
- Save each action with a descriptive name.
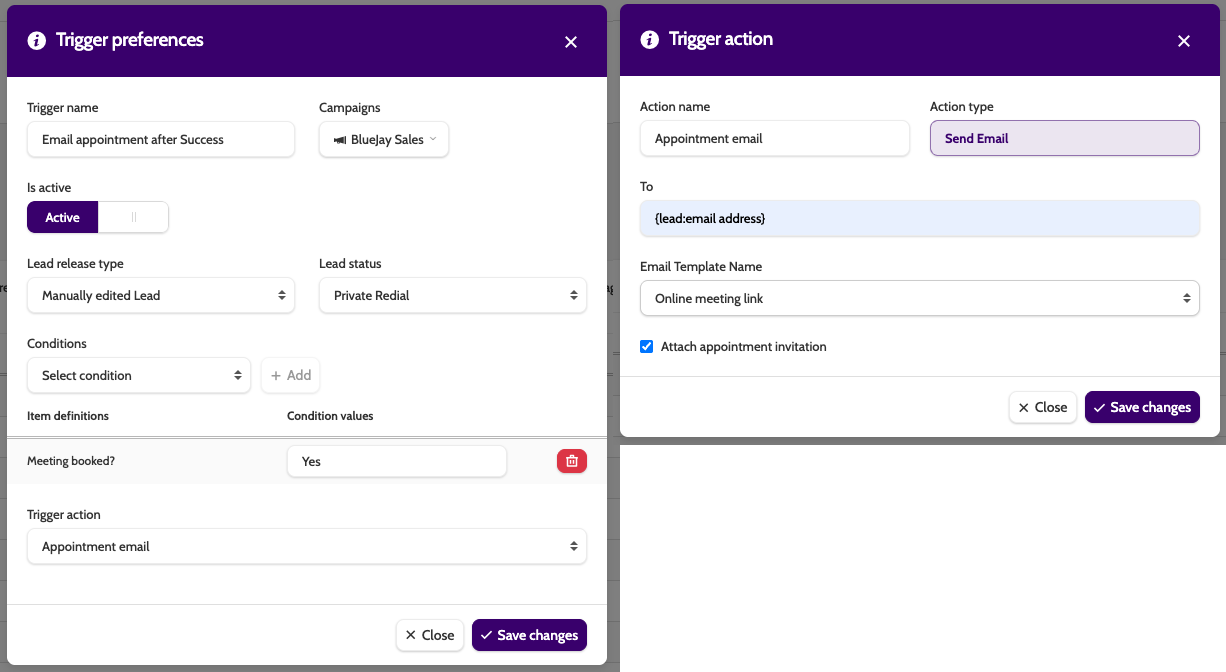
3. Create a New Campaign Trigger
- Click New on the Campaign Triggers page.
- Enter:
- Trigger name — easy to identify in lists
- Campaign(s) — select one or more campaigns this trigger should apply to
- Is active — toggle on if you want it to start working immediately
- Lead release type — choose the type of lead status event the trigger watches for (e.g., closed after max attempts)
- Lead status — pick which lead statuses this trigger should run on
- Conditions — specify data fields/values required for the trigger to activate (e.g., City = Copenhagen)
- Trigger action — link the action you created earlier
- Save to activate the trigger.
👉 A trigger must be linked to one trigger action to work!
👉 Multiple triggers can use the same action if needed.
👉 Triggers can also be cloned and reused across multiple campaigns for consistency!
Check it’s working
- After saving, the trigger should appear in the triggers list with Active status
- Perform the lead interaction you configured (e.g., update a field, clone)
- Confirm the specified action runs (e.g., leads get cloned, emails are sent, status updates apply).
Troubleshooting essentials
- Trigger doesn’t run? Check if:
- The trigger is active
- Conditions are correctly specified (field names + values)
- The linked action exists and is configured properly
- The trigger fires but action fails? Review the trigger action settings (email template, HTTP URL, SMS template, redial type)
- Triggers run too often? Refine conditions to be more specific.
Send email and SMS with Triggers
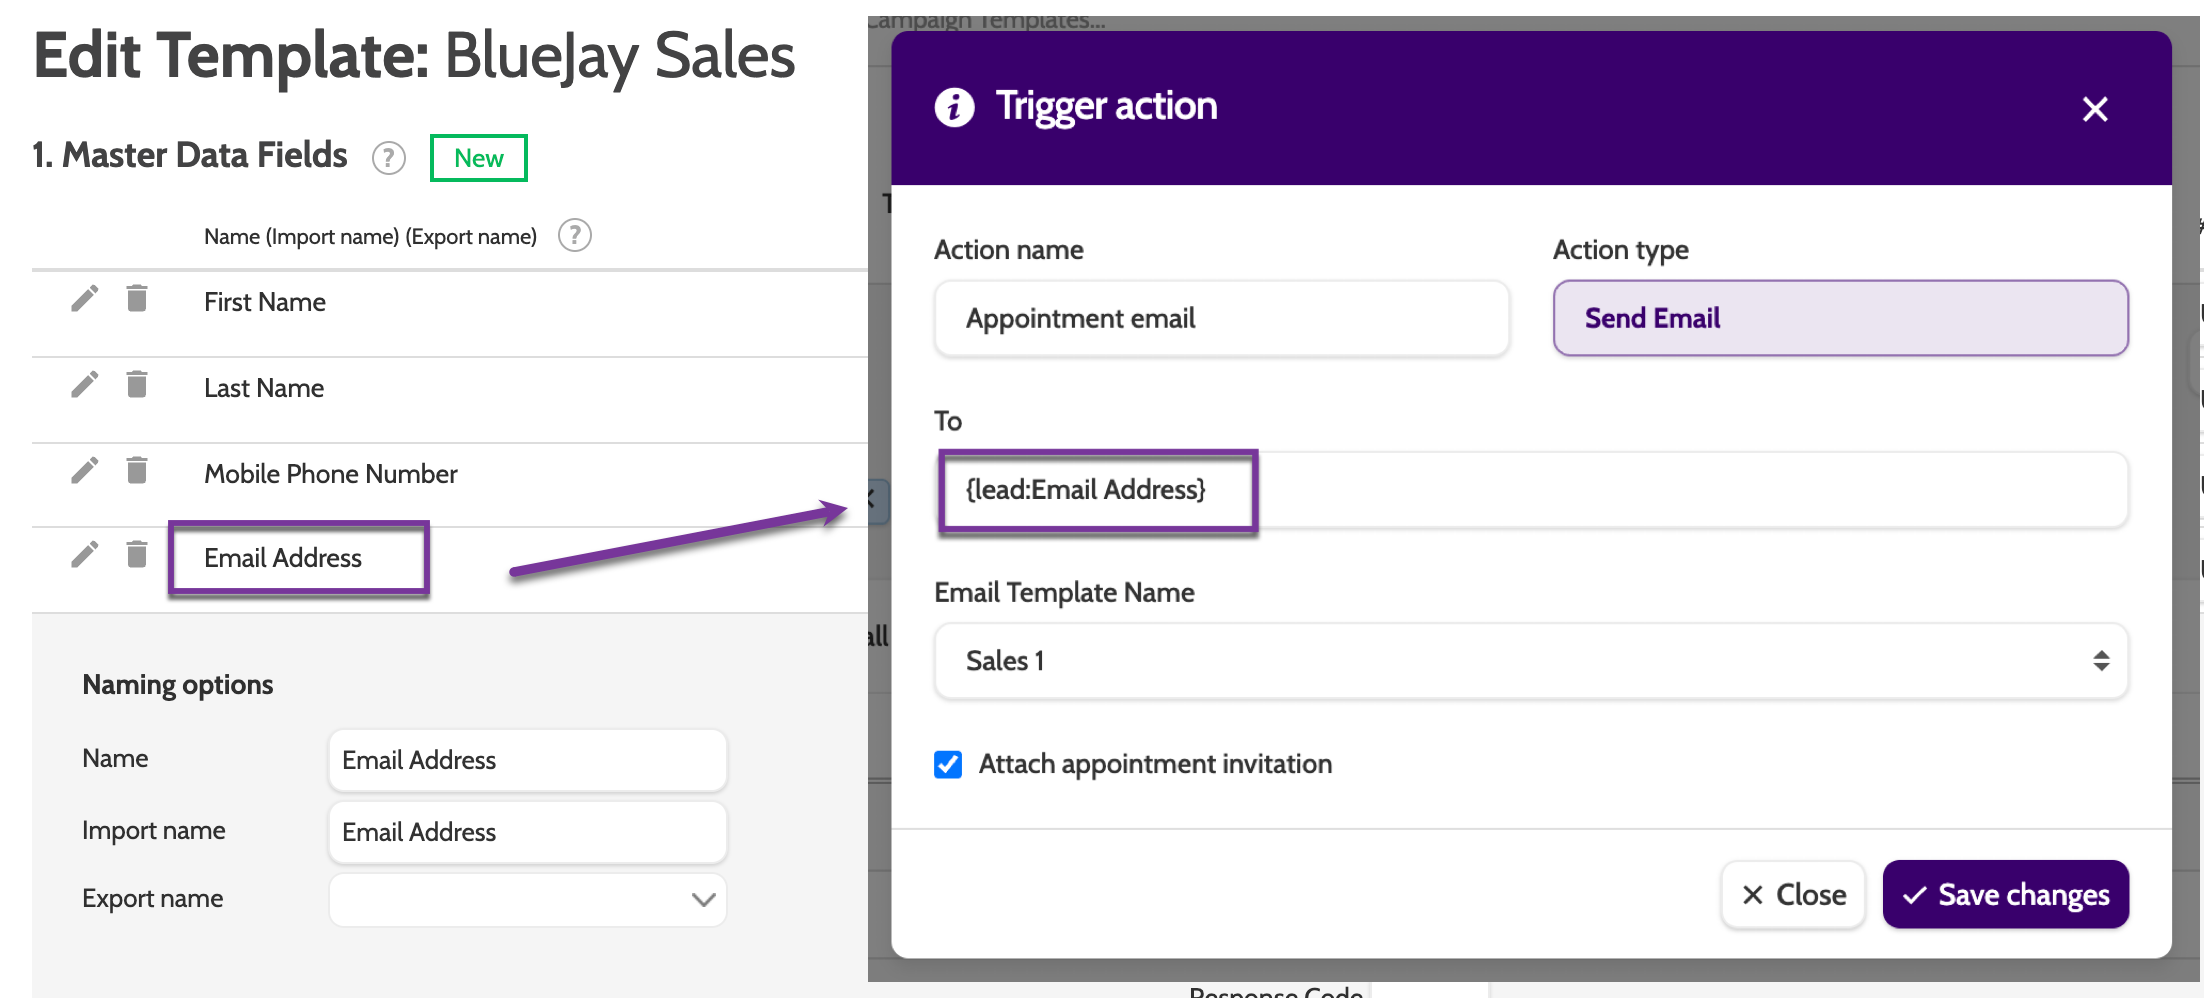
To send email and SMS automatically, create a merge field in the To field that will take the lead's email address or phone number.
Here is the formula: {lead.data field name}
Replace 'data field name' with the name of the phone number or email address field in the Campaign Template. Use a period as a separator.
Inspiration 💡
Here are three proven Trigger setups that save time and boost follow‑ups.
Click an image to enlarge!
- Auto‑SMS after no answer (max attempts)
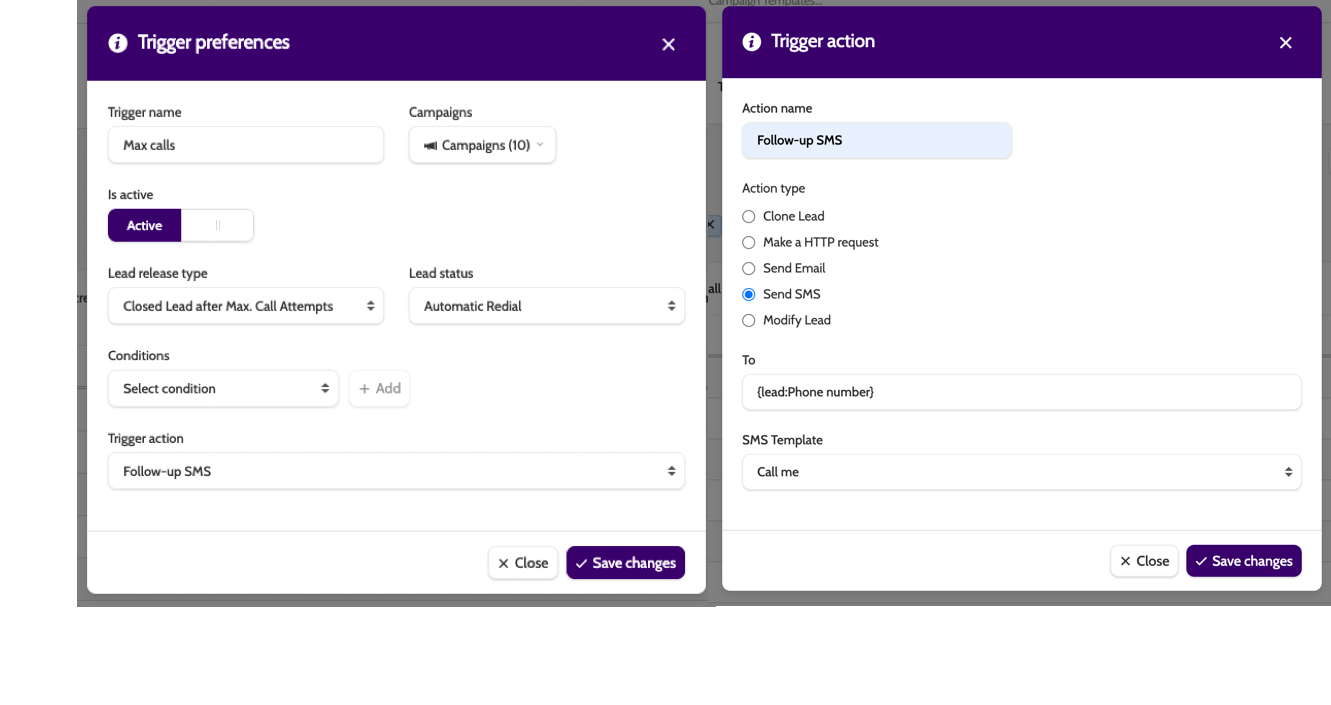
Lead release type = “Closed Lead after Max. Call Attempts” → Action = Send SMS (use your SMS template and a merge field for the mobile). Great for a polite “Sorry we missed you—call/book here” nudge.
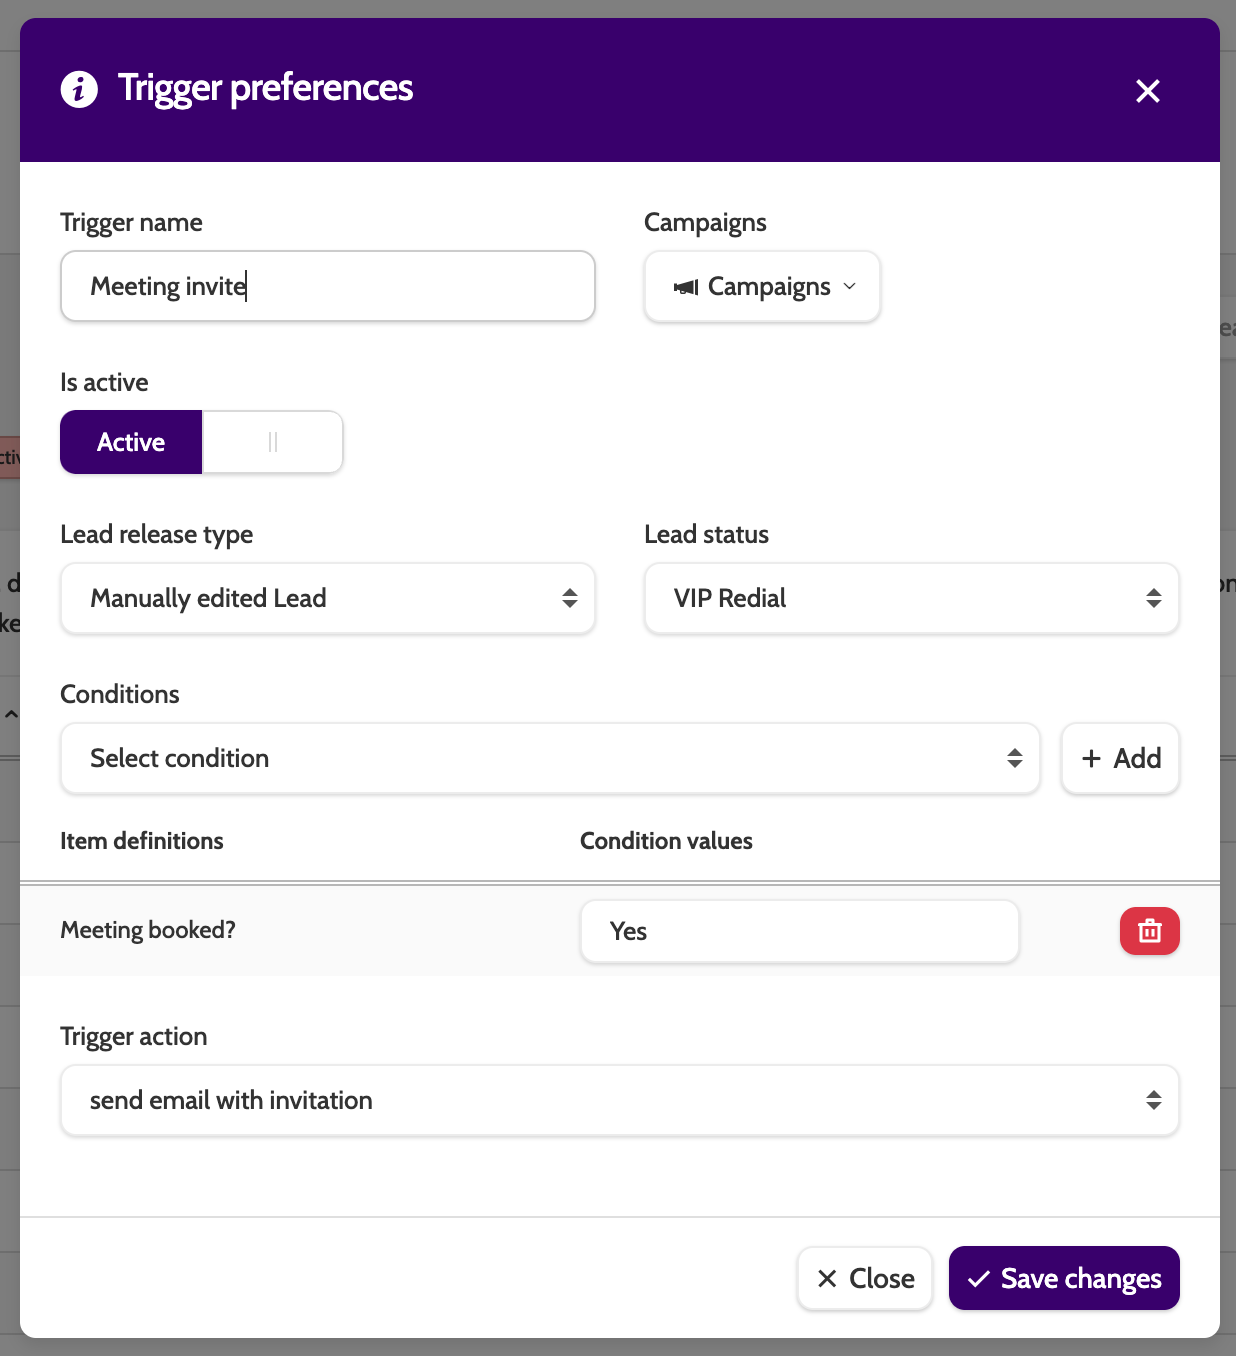
Lead status = Success (optionally add condition “Meeting booked? = Yes”) → Action = Send Email using your “Meeting invite” template (can attach the calendar invite). Ensures customers get details immediately.
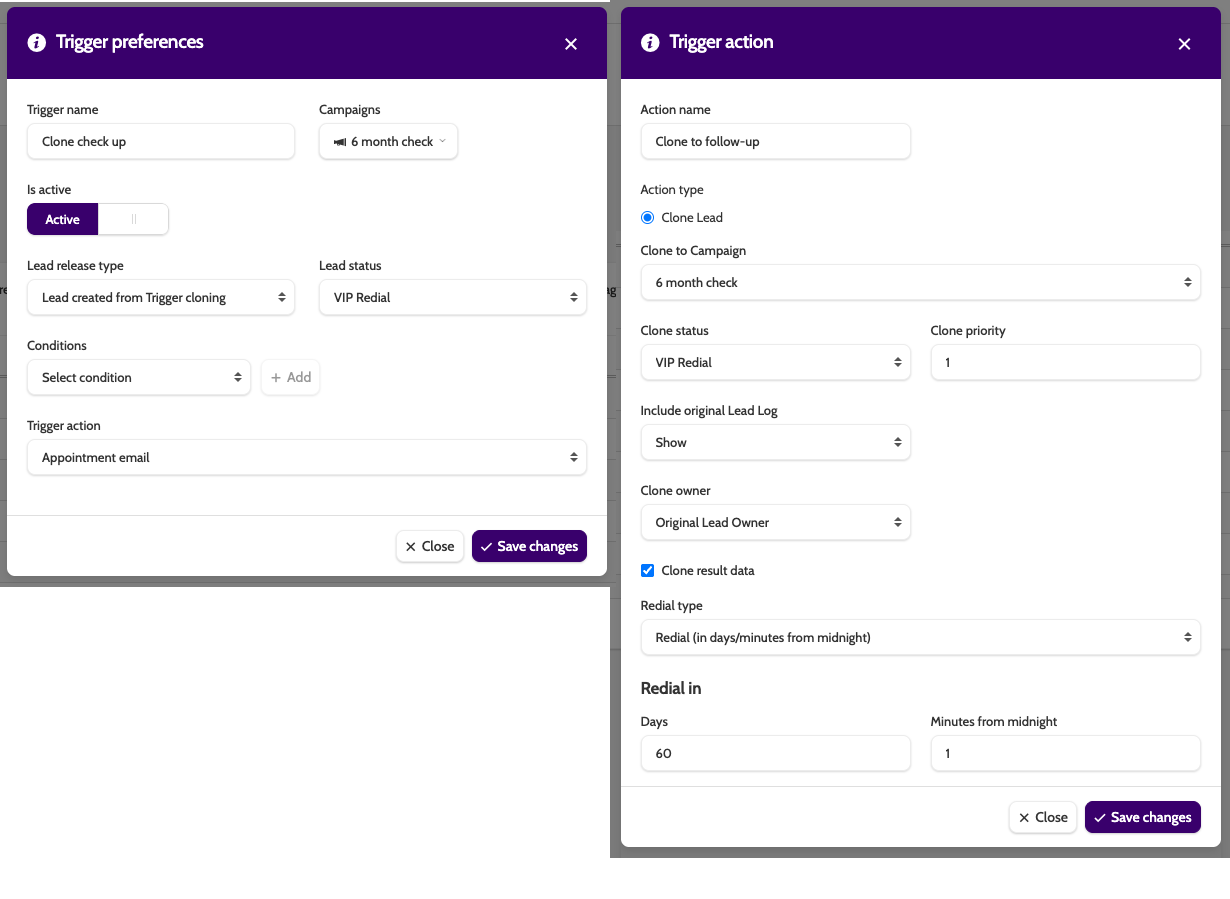
- Post‑sale check‑in via clone
Lead status = Success → Action = Clone Lead to a “Check‑up” campaign; set clone status/priority, include result data, and add a redial (e.g., in 60 days). Keeps retention tasks automatic and owned.