
Quickstart: Setup and incoming call queue
Before you start
- Make sure you have the correct feature permissions (Incoming Configuration and Audio Management / Edit Audio Files)
- Define what behaviour you want when inbound calls come in: direct answer, callback management, or fallback to outbound calls
- Outbound support will provide you with an incoming number
How are leads and calls matched with campaigns?
Incoming calls are matched to campaigns based on the caller’s phone number and your Incoming Configuration settings.
- Step 1 – Number lookup: When an incoming call arrives, Outbound checks for leads with that phone number within the Campaign search scope you’ve set in Incoming Configuration > General Settings
- Step 2 – Single match: If exactly one lead is found, the call is associated with that lead’s campaign, and that campaign is shown on the contact page
- Step 3 – Multiple matches: If several leads share that number (e.g. cloned across campaigns), Outbound picks the lead that was most recently called; its campaign becomes the active one
- Step 4 – No match: If no lead is found in the selected scope, behavior follows “Action on no Lead found”:
- Connect as new – connects call to the agent so they can save it as a new lead (into the “Campaign used for cloned and new leads”)
- Direct transfer – sends the call to the transfer number you’ve configured
- Message and disconnect – plays the “Message and disconnect” message and hangs up.
Step-by-step
1. Setup your call queue
- Navigate to Incoming > Incoming Configuration
- Select the incoming phone number you want to configure, and give the queue a name
- Choose which Campaign new and cloned leads should be sent to
- Setup your incoming number Opening hours. If a lead calls outside of opening hours, they can either be transfered, or played an appropriate message.

2. Configure Lead Handling
Under Lead Handling, you can set rules for how an incoming call is linked to existing leads, how calls are queued, or forwarded.
We recommend:
Action on found Lead > Connect Open and Closed Leads | Why? |
Action on no A-number > Connect as new | Why? |
Action on no Agent > Message and disconnect | Why? |
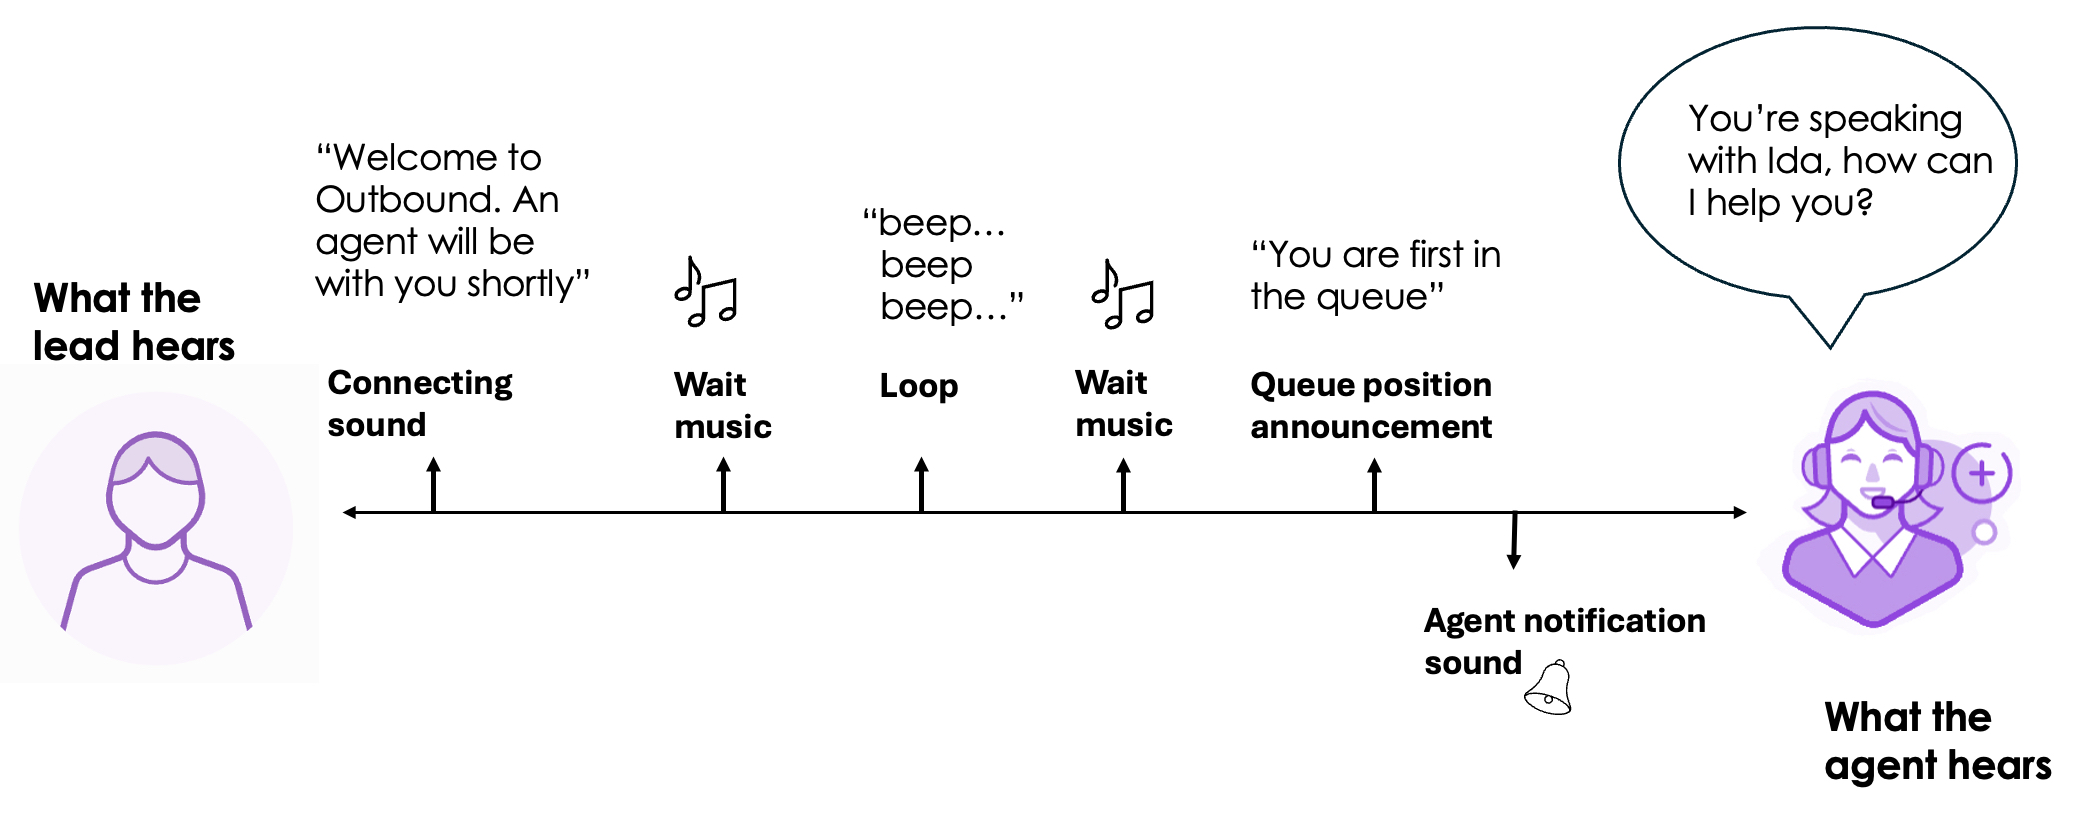
3. Design the Wait Settings
Configure how the leads experience the queue - welcome messages, music, queue position announcements, and more.
You'll need access to the Administration > Audio Management page, so you can upload sound files to use.
Best Practices for queues
Do! ✅
- Use a clear Connecting sound and short Loop sound (≤3s) to set expectations and reduce fatigue
- Add Wait Settings exceptions to play info messages at set times (e.g., 60s, 120s)
- Set Maximum wait time + Action after timeout (Message and disconnect or Direct transfer) to end waits gracefully
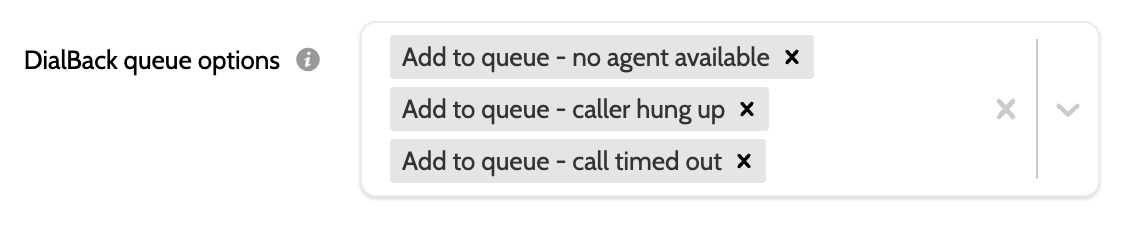
- Enable DialBack for no agent/hang‑up/timeout so callers are prioritized first when agents free up
- Align Opening Hours with staffing; calls outside hours aren’t part of DialBack logic.
Dont! 🚫
- Don’t use long or loud loops; keep messages concise
- Don’t leave queue times unlimited; configure a clear timeout and next action
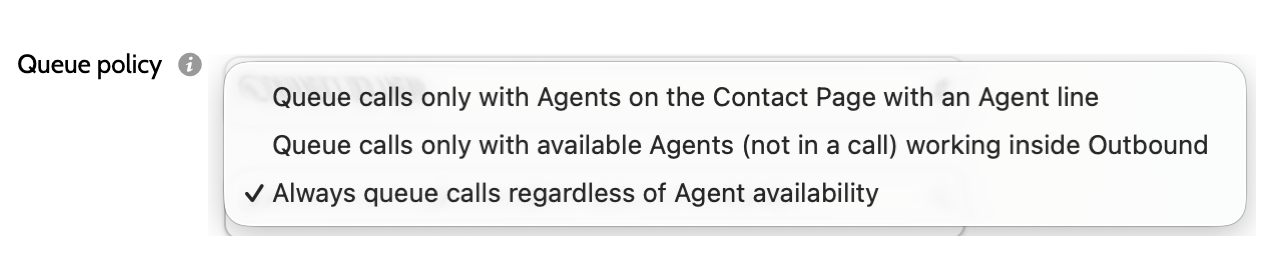
- Don’t forget queue policy—define when calls should queue vs. be routed.
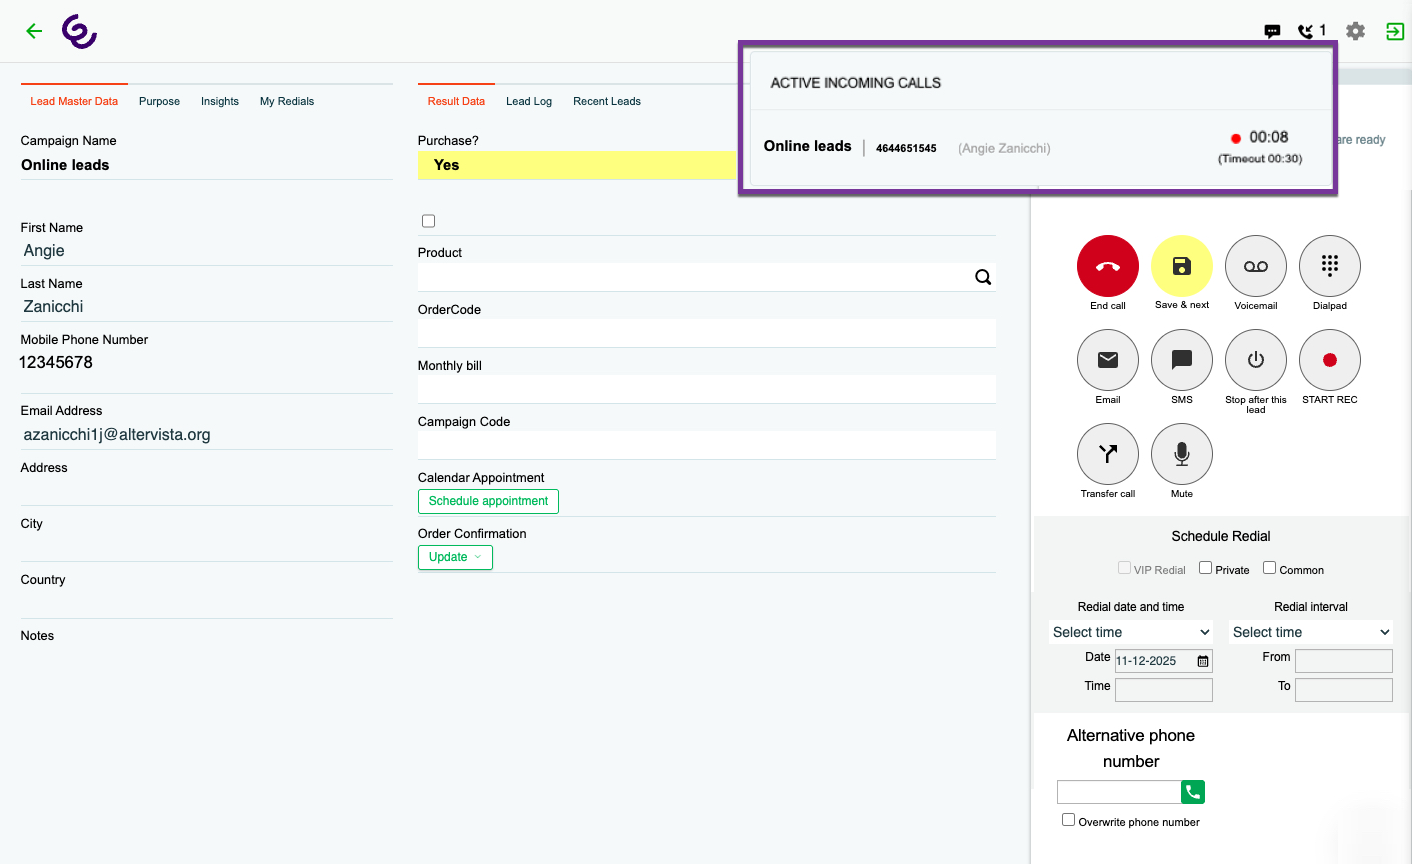
Check it’s working
- Incoming calls appear in the real-time overview and are assigned to agents correctly.
- View reports based on Incoming Calls in Insights > Incoming Reports
- Monitor a live dashboard of incoming activity at Insights > Incoming Live Statistics
🎉 You're all set!
You now have the essentials for handling inbound calls, managing callback behaviour, and blending inbound and outbound workflows.